I've been saying to myself for ages now that I NEED a new wallet. But you know how the hair stylist's roots are often showing, or how the professional gardener's lawn needs mowed? Well, this girl who makes cute handbags all day long has a ripped and dilapidated wallet. So one day while searching the net for something totally unrelated, I came across this unbelievably awesome tutorial.
Jen from
Scissors and Spatulas and her
"{Every Gal Needs a Cute Summer Clutch!}" tutorial is the absolute inspiration for this tutorial. So please follow the link and check out her gorgeous clutch makeover. I posted her button at the end of this tute as well.

Before we get too far into this post, let me apologize for the overload of hot pink daisies in all the pics. I found a new button in my photo editing program called "picture tube" and I simply went crazy with it. Yes, there can be too much of a good thing (especially in the "before" pics above).
You can see that I started with a thrift store leather wallet with a metal frame that has those little balls that you twist to close it. Price: $.99. You may also have noticed the smear of white Modge Podge on the surface of the wallet. Well, I started painting on the Modge Podge before I realized that I forgot to take a "before" picture. Of course, I didn't think to just flip the thing over and photograph the clean side. Lesson learned. Hindsight is 20/20.
Anyway, this wallet had all the nice little pockets that I love, plus a big zippered change pocket right in the middle. My old wallet was a trifold with the change pocket on the outside, and it was so hard to get the coins out of that tight little space. This new coin pocket ROCKS!!!
To get started you will need a wallet, some fabric (I used a cotton quilting fabric), Modge Podge (I used matte finish), a soft bristled paintbrush, scissors, and patience.

1. I cut my fabric quite a bit larger (maybe 1.5" on all sides--I just eyeballed it) than my wallet. I wanted plenty of extra to play with since I had no concrete plan. I painted on a layer of Modge Podge (aka MP) leaving a 1/2" clear border on all the edges.
2. I set the wallet in the middle of the fabric and adhered it to the MP. I used a credit card to smooth out the wrinkles and push out the air bubbles.
3. I could tell by this step that I had waaaaay too much fabric.
4. I trimmed the fabric down so I had only about 1/2" of extra on all the edges. When you do it, you can measure ahead of time. Why didn't I? I'm lazy and didn't want to find my ruler, plus I was impatient and just wanted to get started.
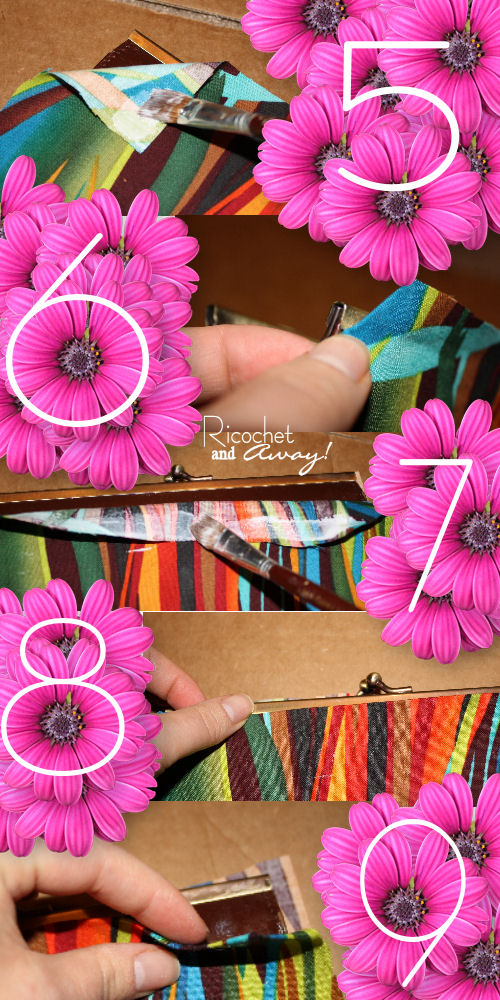
5. I figured my best bet would be to miter all the corners. I painted on some MP to the wrong side of the fabric at the corner.
6. I folded in the fabric corners just enough so the fold lined up with the corner of the wallet.
7. After I was satisfied with all the corners, I painted some MP on the top edge of the wrong side of the fabric.
8. It took some time to get it just right, but I folded under the fabric making the fold line up perfectly with the edge of the metal frame.
9. You can see that up to this point the fabric is still only adhered to the wallet in the middle and the edges all still free.

10. To get the sides folded under correctly, I started by folding the fabric back on both sides and painting a stripe of MP along each edge. Then I tucked under the fabric so the folds lined up with the sides of the wallet. This was a little tricky since the metal frame didn't allow wallet to open up flat.
11. You can see here the corners are now mitered and pretty.
12. You can try to do all your measuring and mitering of your fabric BEFORE you adhere it to your wallet. BUT, be warned: fabric saturated in MP gets stretchy and wallets have slightly curved surfaces so it's difficult to line up all the edges.
13. This is where I finally adhered all the folded edges of the fabric to the the wallet.
14. The next thing I did was to apply an
even coat of MP all over the outside of the wallet. This will "seal the deal".
15. I stuck my hand inside the wallet while I painted the MP onto the fabric. Then set it up like this to dry.
16. As it dries, the MP becomes transparent.
17. I applied 3 coats of MP, making sure the previous coat was completely dry before starting the next. The ENTIRE process up to this point lasted as long as 2 episodes of Glee.

The next day, after having dried and "cured" all night, I wasn't happy with the roughness of the surface.
18. So, I sanded the surface with 280 grit sand paper. This smoothed the surface, but left me with a less-than-lustrous finish.
19. So, I got out the steel wool and did a wet sand.
20. After the wet sand, I wasn't sure if I ruined the wallet completely, or what. The surface was all milky again and I wasn't sure what was going to happen. Thank goodness it dried up real nice and clear and shiny.
21. The very last thing I did was take my jeweler's cloth and polish up the metal.
My daughter was kind enough to hold the finished product for a few closing photos. I am loving my new wallet. I hope you enjoyed this long-winded tutorial, and I hope you had a good time embarking on this journey through Craftdom with me! Be sure to push the button below and give Jen at Scissors and Spatulas a look-see.