Showing posts with label pattern review. Show all posts

Monday, October 8, 2012

Pattern Review: M5822

I needed to make a diaper bag to be auctioned off at a charity benefit. This lime green tote bag is what I came up with.  I started with a pattern by designer Kay Whitt.  You can see another Kay Whitt review I wrote HERE.  I love her clean designs that just cry out for bold fabric choices.  Here's a pic of the pattern I used for the diaper bag:
M5822
Kay Whitt Designs
Tote Bag in Three Sizes
M5822
[source]
This pattern from McCall's Fashion Accessories line allows you to make a tote bag in 3 different sizes.  The tote features a recessed zipper, an interior pocket, and two exterior pockets.  The pattern suggests you use novelty cotton fabrics or cotton blends, plus buckram (Coarse linen or other cloth stiffened with gum or paste and used typically as interfacing and in bookbinding. [dictionary def.]) and fleece for interfacing.  

Of course it is almost painful for me to follow a pattern exactly without tweaking it just bit.  I'm the same way with recipes--it must be a personal defect.  Anyway, the alterations I made were:

  1. Skip the zip.  The zip would be nice for a purse, but diaper bags need to be accessible.  The tote is tapered so the opening is already small.  A zip would have made the opening even smaller.  It would have been very difficult to find important things like binkies and nail clippers in this deep dark bag.
  2. Exchange novelty cotton fabrics for vinyl and corduroy.  The lime green vinyl and funky corduroy print were dying to be used together!  Plus, I had this soft brown vinyl that I used for the handles that went perfectly.
  3. Customize the interior pockets.  One single patch pocket for a diaper bag is not optimal.  
  4. Exchange buckram and fleece for Peltex heavy interfacing.


Here's some pics of my customized interior pockets.  
You can really tell which pics were taken in natural light and which were taken in my craft dungeon:

I made a patch pocket that mimicked the shape of the bag.  The pattern included a similar pocket, but I didn't feel like going through the trouble of cutting it out.  I added some bias tape to the top edge of the pocket.  With the excess bias tape, I attached a toggle clasp that I stole from a used purse.  This was a fast and easy way to include some handy hardware.  I attached the pocket to the lining with a double row of stitching in a light pink thread.

For the pockets on the other side, I simply cut a panel exactly the same shape as the lining, but about 5 inches shorter.  I finished the edge with bias tape again and basted the edges that would eventually be enclosed in the side seams.  I divided the pocket in half with row of stitching.  I knew the top of the center stitching needed to be very secure because it would experience a lot stress with regular use.  So instead of sewing a little square on the bias tape, I stitched a couple big hearts.  I didn't stop there either.  I took ended up adding some embroidery as well.  You can also see I added a row of my Ricochet ribbon that I blogged about a loooooooong time ago.

In straying from the recommended fabrics, I had to do some things differently.

  1. You can't iron vinyl and Peltex sucks up glue.  Since I couldn't iron-on the Peltex to the vinyl I decided to glue it on.  I used regular old Tacky Glue in the gold bottle.  The Peltex sucked it right up and it didn't stick a lick.  So I took some Mod Podge and coated a side of the Peltex with it, effectively sealing it up or priming it to take the glue.  After it dried, I used the Tacky Glue with great results!
  2. Regular polyester thread and 80/12 needles weren't going to cut it.  To effectively sew the vinyl I switched to a heavy-duty 110/18 needle, heavy-duty top-stitching thread, and increased my stitch length to 4.  [I sew on a Singer 4411 HD]
  3. Watch out for bulky seams!  The curved sides and the thickness of the vinyl and corduroy were hard enough to sew without adding the bulk of the Peltex into the seams as well.  To remedy this, I trimmed all the Peltex to fit within the seam allowances.


In conclusion, here are the pros and cons, IMHO, of M5822:

Pros:
  • Cute shape.
  • Simple design.
  • Easy to follow instructions.
  • Easily customized. 
  • Comes in 3 sizes.  I used the largest size.
Cons:
  • Finishing the top with a strip of binding was tedious. I couldn't risk making extra holes in my vinyl so I ended up hand sewing the binding to the lining.  I prefer the method were you stitch the lining to the bag, right sides together, and then pull the whole thing through a opening in the lining.  
  • The smaller 2 sizes don't appeal to me.  I would have preferred a even larger size though.
  • The recessed zipper would make the opening very small, even in the largest size.  I suggest an inner tab with a magnetic clasp instead.


The tote is easy enough to sew that a reasonably knowledgeable sewist could duplicate it without having to buy the pattern.  Once you made the front/back panel, all the rest of the pieces are rectangles.  Easy, right?

I'm thinking about making my own tote based off this pattern from the brown vinyl I used for the handles.  I have enough of the green vinyl to use as an accent.  Neon colors are so "in" right now.  I hope I can finish and use my tote before they are "out"!!!

Hope you all find this review useful.  I would love some more pattern suggestions for large tote bags, if you have any.  Are any you Kay Whitt fans like myself?  What's the last pattern you've sewn?

Happy crafting and big hugs from Montana,
Pin It
Vote: Fab Folds Challenge

Friday, April 27, 2012

Garment Sewing Challenge

Garment Sewing Challenge: May 2012
[psst...this banner is button linked to the challenge homepage..click on it]

I'm a bit apprehensive about the month of May.  Not the entire month.  Mother's Day is a nice event to look forward to.  However, the sewing challenge I got myself into.  Now that's another matter.  I have challenged myself (and others) to make a garment that I would be proud to wear in public.  I have a short history of sewing myself tops that rarely leave my closet and almost never leave the house.  Curious?  Kindred spirit?  Keep reading and I'll explain my dilemma.

First, I found this lovely top on the BurdaStyle website:  
44e2f91187ada82c17ec27251c4280cab7749458_large
[source]
Isn't it cute?  Casual, but stylish, right?  A pleasant step away from my usual uniform of t-shirts.  Plus, it was a free pattern and it looked quite simple to make.  What could go wrong?  Silly question.  First of all, I chose to work with knits for the first time.  I found a crazy good deal on all sorts of knits at a garage sale.  The seller used to make clothes for her whole family.  She had these striped knits that she used for making polo style shirts for her husband.  (Here's an example of I'm talking about.)  The price was right so I bought them all up.  When I found the BurdaStyle batwing top pattern, I thought I'd be so creative and use some of this polo shirt fabric.  Then I thought I'd blow the mind of the sewing world and turn the stripes vertical.  Yes, I thought I was so clever.  I was so wrong.  Take a look at my end product:
  

You might be thinking that it's not so bad.  I admit, it's not terrible looking.  However, it did not turn out anywhere near as cool as I had hoped.  I look like a rugby player or maybe a referee.  Structurally, I didn't take into account that the knit I chose only stretches in one direction.  So when I turned the stripes vertical, I ended up with a shirt that has no give "around" the torso.  Instead, I can stretch it down to my thighs.  But really, what good does that do me?  The biggest element of design that suffered was the bottom hem.  It has absolutely no give so it's tighter than I'd like it to be across my hips and more difficult than it should be to take on and off.  I'm not sure what happened to the neckline either.  The photo of the original shows a much deeper v-neck with thinner trim.  

I decided I had learned from mistakes and I'd try the pattern again.  This time I figured screw the neckline, it was too hard.  I went with a boat-neck style instead.  I used some velour knit from the same garage sale.  Here's how it turned out:
Halfway through cutting out my pattern pieces, I realize I don't have enough fabric.  I solved the problem.  You might notice that the front panel is divided in half.  When I was done, the top top was really big and bulky on me.  I ended up adding elastic to the bottom hem.  Conclusion:  this top is doing me no favors figure-wise, but it's OK for keeping warm while sewing in my basement craft room.  I think this style would look OK on me if I could get the fit and fabric right.  But I can't bring myself to try it again.

I researched my body type:  I'm a busty pear.  Not something I like to brag about, but I do enjoy joking about it!  What that means is that if you were to measure under my bust (my rib cage) I would be a size 8, my bust is a size 10, my hips a size 12.  Basically, I'm a small, medium and large sizes all at the same time.  According to my research, I should look good in tops and dresses with empire waists, deep v-necks, and no flaring out at the hips.  So I found and bought this pattern: McCall's M6120.  Here's an image of the top:
M6120
[source]
And here's how it turned out:

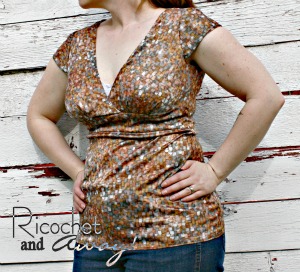
Once again, I used garage sale fabric.  This time it was a slinky, stretchy, metallic, synthetic fabric.  I feel like technically, I sewed a decent garment.  However, I failed in the fit and the fabric.  My bust was too big for the size I chose making the nice thick empire waist band curl up under my bosoms, and look sloppy.  The pretty little pleats are stretched to the limit, and my bra shows.  The fit across my shoulders and middle are is great though, so that's a plus.  The fabric, well you can see it's not very cool.  Literally, it's not very cool.  I sweat like a pig in it and it's so slinky, it just creeps up my body settling under my chest.  Not good.  Discouraging, in fact.  I haven't tried to sew a top for myself since.

So now you see why I NEED this sewing challenge.  I can sew handbags and am beginning to quilt with ease, so why can't I sew a stinkin' shirt?!!  This time, it will be different.  I have looked back on my past efforts and decided I need to step up my game and fork out some dough for better equipment (e.g., fabric).  

Look what I found:
Pippa is our cockapoo.  We rescued her from the pound a few months ago.  I love her!

I found a really cool piece of fabric at an actual fabric store, not someone's backyard (not that quality items can't be found at garage sales...that would be blasphemous to my thrifty principles), although it was on clearance at JoAnn's.  What can I say?  I'm cheap.  Anyway, I know some of you are thinking that fabric would be perfect for a skirt, right?  Well, I don't really do skirts, sorry to disappoint.  To back on subject, the fabric is a polyester knit.  It is a little silky, with a little bit of stretch.  I think it might work for this circle top pattern at a cool blog called Sweet Lemonyde.  I think this flowy top just might work with my fabric.  Thoughts?  Please, I need feedback so I don't hate myself.  Maybe that was too much pressure I just put on you?  How about you all just be friendly and keep me from making a wrong turn?  Please.  :-)

[source]
I'd like to make the neckline and edges finished very professionally, so I pinned this great tutorial by ikat bag.
[source]
One stipulation of this challenge is that you MUST try something new.  Making a top I actually liked is something NEW for me, but somehow I don't think that conforms to the spirit of the rule.  Instead, I'm going to learn how to bind edges with knits, AND how to tailor a pattern to fit my busty pear dimensions.  

Hopefully, I can pull this off and make a top worthy of public viewing.  Unless of course, you think I'm not on the right track.  Geesh, can you tell I have no confidence in this area?  Help.  Please.

While you're hear, please vote for your favorite Typography Challenge entry (during April 2012) and then check out the garment sewing challenge homepage.  You should join us.


Happy crafting and big hugs from Montana,
Pin It

Thursday, April 19, 2012

Welder's Hat: I found a free pattern!

So here I am with NO MAKE-UP wearing a welding cap and trying to take photos of myself while posing in front of our big picture window.  The neighbors, leaving for work, pause for a moment as they try and figure out what the heck I'm doing.  I'm a 35 year old SAHM of two, and I can take pics of myself in full view of the neighbors if I want to, I tell myself.  I'm just so excited to share this cool new free pattern that I found. I feel like there is no time for mascara and waiting until the afternoon sun is high enough to shoot photos in the back yard.  This needs to be done now.  So there you have it. ;-)

welding
[Photo Credit: www.skinnermetalproducts.com]

Perhaps you'd appreciate a little background first?  If not, scroll down a couple paragraphs because I'm feeling wordy this morning!  To begin I should tell you that my father is a welder as well as my brother and a couple of my cousins.  That is how I came to be searching the web for a sewing pattern in the first place.

One mark of a good and safe welder's cap is that it is made of 100% cotton (linen may work as well).  That makes sense because we all know that synthetics like nylon and polyester melt when exposed to heat and flame.  Also, as you can imagine, welding is a hot job and a breathable, absorbent material like cotton is preferable.  One's hair and back of neck are exposed when wearing a welder's protective mask.  The cap part of a weldering hat is made to stop the sparks from burning hair while the soft, short bill is turned around backwards to cover and protect the neck.  And lastly, the adjustable halo straps of a welding mask are made that much more comfortable when cushioned by a welder's hat.

And besides all that, I think welding hats are cute!  What do you think?  Can you imagine what they would look like with a few fabric flowers, yo-yos, buttons, and broaches to fancy them up a bit?  Welding hats could really be fashionable.  The cap part is deep so it will cover a lot of square inches of hair.  It was a little too deep for me and my pony tail so I folded the back of the hat band up in the back.  This revealed a peek at the fabric of the reverse side and let me wear my pony tail a bit higher.  I think it's a cute look.


OK, now onto the the DIY part of this post!  I found a w-o-n-d-e-r-f-u-l FREE pattern online.  Special thanks to fellow flickr member Seamingly Simple!  You can find her ingenious pattern HERE and the instructions HERE.  Or you can find it on PatternReview.com HERE.  Did I mention the hat is REVERSIBLE?  No?  Well, it is and that's another pretty cool thing, right?

What you'll need:

  1. The printable pattern.
  2. 1/2 yard of fabric. (1/4 yard for each side since it's reversible)
  3. A scrap of thin quilt batting OR interfacing for the bill.  I didn't use either in the hat I made for myself because the fabrics I chose were of a heavier weight.  I used Craft Bond fusible interfacing in the bill of the hat I made for my son.
  4. Coordinating thread.  (contrasting thread might be fun for the top-stitching)
  5. A little time.  The first hat took me an hour start to finish, but second one took me only 30 min.
Some tips that I found helpful:
  • Cutting the bill fabric on the bias is not necessary, but I like the look and how it lays nice and flat on the curved seam.
  • The instructions concerning construction of the crown were confusing to me.  I ended up making 2 bowl-shaped caps, attached the bill to one of the bands, and then attached the bands to the caps.  From there I stitched the two hats together, right sides together, around the the bottom of the band.  I left an opening and pulled the right sides through just like when I attach the lining to a purse.
  • I trimmed the seam allowances of the curved seam of the bill with pinking shears.  That just seemed easier than cutting out a bunch of little notches to ease the curve.
  • The "scale bar" on the printable pattern is ingenious!  Just so you know, if you print it out at 100%, the scale bar measures 10cm and the pattern is perfect for a 25" head.  If you print it out at 96%, the scale bar measures 9.6cm, at 93% it measures 9.3cm and so on.  You can totally customize this pattern to fit ANY head size.  

My son likes his hat, but suggests I make another one for him using "tougher, boyish" fabric!


This hat reminds me of a page boy cap, one of my fave styles.  Here are a couple page boys I found online.  I bet the welder's hat could be modified a bit the emulate one of these:
Burberry Wool Duffle Cap
[source]
Here's a similar hat that I found from Nordstrom.
Shorten the bill of the welder's hat and make it out of tweed?

[source]
This is a pageboy hat from TJ Maxx.
Make some fabric buttons to decorate your welder's hat?

Happy crafting and big hugs from Montana,
Pin It
If you're here in April 2012 vote for your fave Typography Challenge entry:
Typography Challenge Poll

If you're here before June 1st, 2012 please check out the "I'll wear it in public!" sewing challnege:
Garment Sewing Challenge: May 2012

Sunday, November 13, 2011

Pattern Review: McCall's M6045


Today I'm showing off 3 purses, all from the same pattern, that I sewed earlier this year.  The pictures above show me modeling one of the purses.  Several months ago JoAnn's had a sale: $.99 for all McCall's patterns.  A great deal, right?  I couldn't pass it up.  This is McCall's M6045, and the price on the package is $18.95.  Woo-hoo, what a bargain!  Keep on reading and I'll tell you all about it.


For this purse I used some blue corduroy for the gusset and straps.  The peacock print is a regular light weight cotton, as is the butterfly print I used for the interior.  The orange hibiscus print came from a sarong I had lying around.  The fabric covered belt buckle was a first for me.  I found the DIY buckle kit at a thrift store and just followed the instructions.  It was very easy.  You might be able to see from the interior shots of these purses that the seams where the sides attach to the gusset are finished with bias tape.  This gives the bag a lot of its structure, allowing it to hold its lovely shape.  


This was actually the first purse I sewed with this pattern, a combination of 4 different prints.  The pattern asks you to use the same pleated pattern piece for the interior and exterior side panels.  I wasn't happy with all the pleats on the inside.  It made it difficult to customize interior pockets, and frankly was a waste of fabric.  For subsequent purses, I drafted a flat pattern piece to used for the lining.    I often use soda cans when taking photos for clients.  The size of a soda can is universal so it's easy to get a feel for the comparable size of something.  This purse easily holds 5 cans with lots of extra space between.  The antique buttons on the strap are a translucent smokey color.


I called this purse the Wasp.  The black of the gusset has a snake skin texture.  The side panels are a home decor canvas.  The rest is a lovely cotton blend print that I picked up at a garage sale.  I really love it and was happy to show it off in this purse.  Two more antique buttons finish off the straps.  In the bottom right photo you can see how straps connect to the base of the purse.  This is the trickiest part of the whole bag.  The strap is basically a tube in which you insert the top corner of the bag.  Then you sew through several layers (9, I think) of fabric to connect the them.  I had to do a lot of hand turning, and even some hand stitching to connect this.

M6045
Here's the picture from the front of the pattern envelope.
McCall's M6045
The Sylvia Sling
The pattern was designed by Kay Whitt of  Serendipity Studio.
I found the pattern on Serendipity's site where it's called  The Silvia Sling.


Sew Serendipity
You can find Kay Whitt's blog here.  FYI, no one asked to write this review, so of course I'm not being compensated in any way.  I just found something cool and wanted to share it with you.  Kay Whitt has an aesthetic that I feel is similar to Amy Butler's point of view, however the patterns are considerably cheaper:  $11 versus $16.  

Ms. Whitt has a new book out that I am dying to purchase.
I'm thinking this will be an early Christmas to myself!
You can order the book here

And this is Ms. Whitt's Madeline Maxi Dress.
(She's modeling it herself!)
Her version of the popular maxi dress features a
 structured design that would look so much better on me
than the typical maxis out there.  I mean, I could
wear a bra with it--a total must for me!
You can order this pattern here.

I'm following Kay Whitt's blog now, so I can keep apprised of her new designs and books.  I highly recommend the Silvia Sling pattern if you're ever looking for a cute but spacious shoulder bag.  

Since you're here, I have to remind you that we are in the midst of our Solids-Only Tote Challenge.  If you think you can finish a tote by the end of the month, I encourage you to join us!  You can find all the info you need to enter, plus profiles of all the participants, on the challenge homepage.  

Happy Crafting and big hugs form Montana,
Related Posts Plugin for WordPress, Blogger...