Monday, September 26, 2011

Wedding Weekend

My cousin got hitched last weekend and it was a grand time!

Sarah and Jen are twins with big sister, Krystal.
Aren't they absolutely lovely?

This was a fishing themed wedding.  Yes, fishing!  The bride and groom are avid fisher persons and lovers of all outdoor sports and pastimes.  Check out the centerpieces.  A fishing bobber holding a photo of the couple suspended in water. 


Jen asked me to sew some little bags for the bridal party and I initially came up with this:

find the tutorial here

However, I changed my mind.  I wanted to play off the fishing theme as well.  How often does one get the chance to make fish purses?  Not often enough, I say!  So this is what I came up with instead:


It's a simple lined pouch with a zipper down the spine.  The little strap is attached to the zipper pull.  The fabric is a crushed velvet with a bit of embroidery and fish-scale-like clear sequins. 

The total bummer about these little purses is that I forgot to take pics of them.  I had big plans to string them all (seven in total) up across my fence and take a "group" photo.  But, I sent them off before I could do that.  Still kicking myself! 

Then, I thought that maybe I could get a pic of all the bridesmaids holding their fish purses.  Well, honestly, I couldn't bring myself to ask them.  They were busy with all the professional photos before the wedding and busy with all the reception stuff after the wedding.  Everyone was asking them to take this photo and that photo, to dance with this uncle and that cousin.  I didn't want to add to their duties.  So, lesson learned.  :(  Next time I won't forget!

Cousin Jen had her wedding on Friday, and the next day my cousin Larry and his new bride had a reception (they were married in Las Vegas).  Yet another fun time with family!


All this talk of weddings has me thinking about me and Mr. Ricochet.  Here we are on our way to go out and listen to some jazz.  This photo was taken 10 years after the day we met.


Happy crafty and big hugs from Montana!

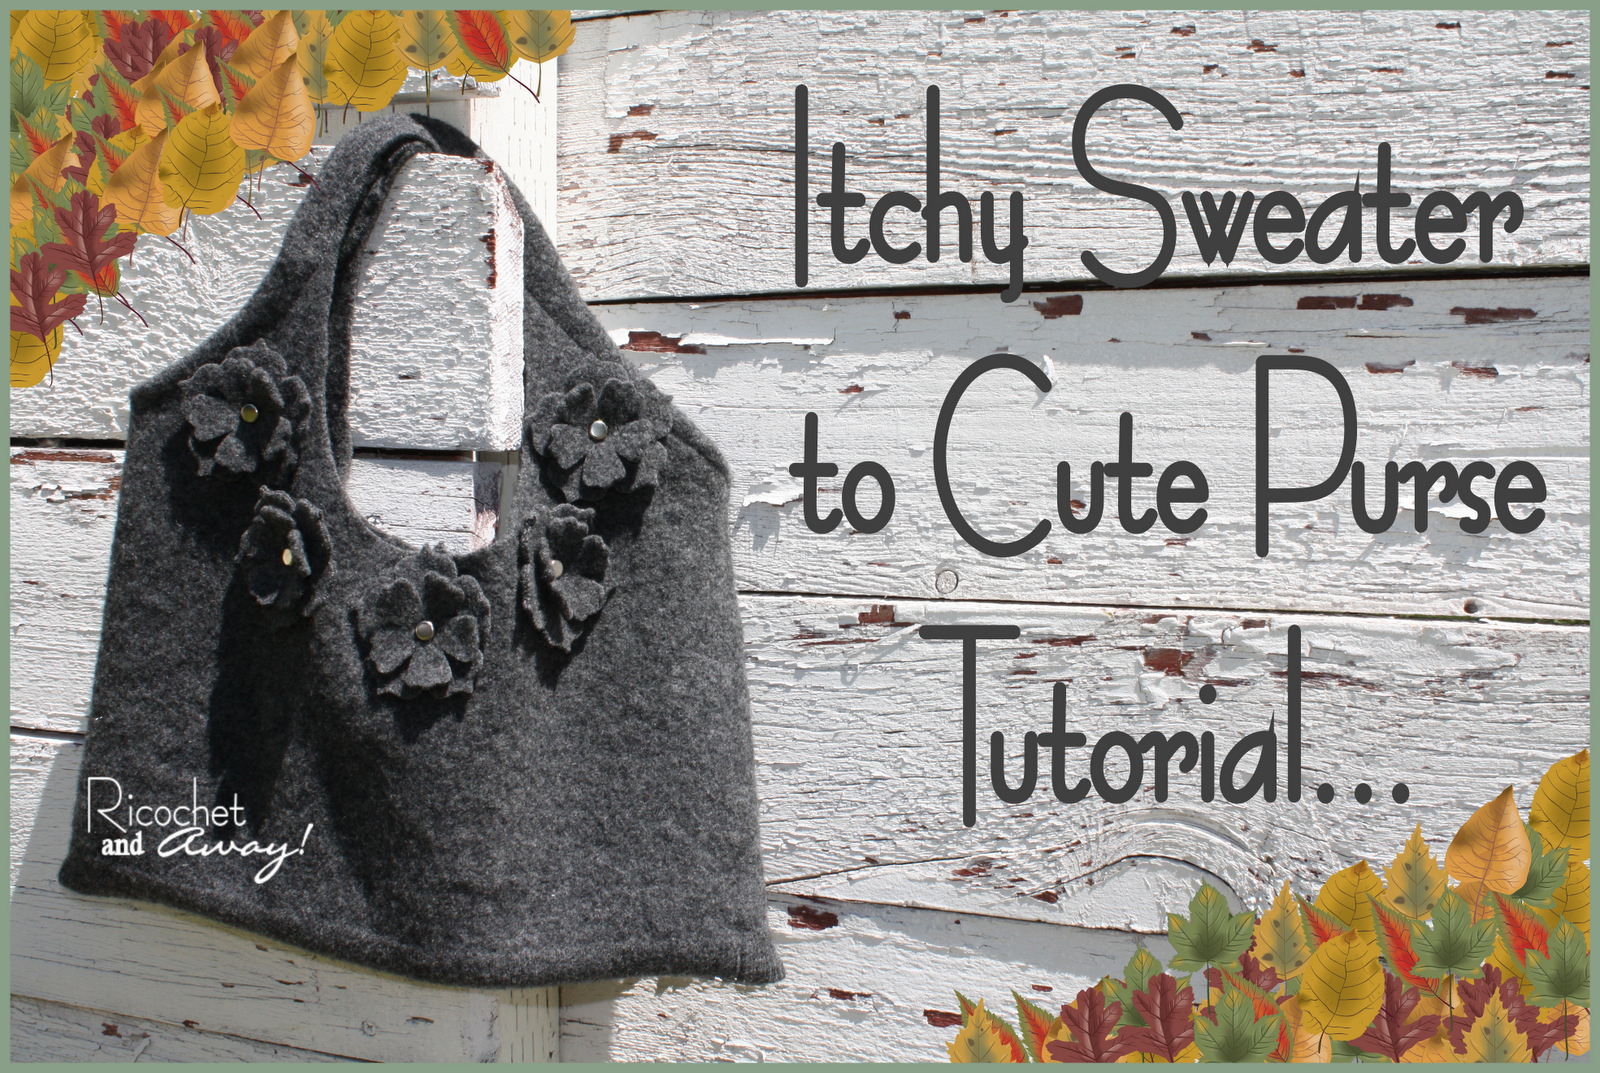
Itchy Sweater to Cute Purse Tutorial

This post was shown originally on Creating my way to Successs!
It is my first guest posting job and I loved it!
I hope you do too!

Here it is!  I didn't change a thing.
        Happy Friday!  My name is Rikka J. and I'm here from Ricochet and Away!  It's a crafty blog with a focus on sewing bags.  Creating my way to Success has been my go-to location for blogging tips, Round Tuit linky parties, and sewing tutorials so it is quite the honor to be guest posting for Jill today.  You can get to know me better by checking out some of my favorite tutorials:
Up-cycle an Old Wallet
In recognition of Jill's passion for up-cycling and re-fashioning clothing, I am sharing a great wool purse tutorial.  Enjoy!

Look for a thrift store sweater
with a 100% wool label.
Hello sweater season!  I created this chic little purse way back in July and have been sitting on it until now.  Summer time is not the right time to unleash a gorgeous felted wool handbag, but you don't know how hard it was for me to wait!  Because I like you so much, I even threw in a quickie bonus tutorial!  Yes, my faithful and first time readers, you get 2 tutes in one today!  Tell your friends!  Pass it on!  If you can wash clothes, use scissors, and sew a straight stitch on your machine----you can do this!

Supplies you'll need to get started: 
an itchy 100% wool sweater
washing machine and detergent
dryer
scissors
chalk to mark sweater
sewing machine with coordinating thread
Optional: magnetic clasp
Attention: click on any image to view it full-sized
First step is to "felt" your wool sweater. To do this, you must do what you are never supposed to do with a wool sweater: Wash it in your machine in hot water (with a little soap) and dry it in your dryer. (warning: be prepared for lots of lint!) The agitation of your washing machine is crucial. Please don't assume you can soak your sweater in hot water and cause felting. You could also throw in some jeans and set your machine to "extra-dirty-extra-long-cycle" to make sure the sweater is really agitated and rubbed around. That will cause the fibers in the wool to get all matted down. What once was knitted yarn will become a dense, rich felt, like magic!
How do you know your sweater is felted properly? Answer: you will be able to cut it and no unravelling or running will occur. You may have to wash and dry 2-5 times to achieve your desired degree of felting. I washed the sweater I used in this tute 3 times causing it shrink nearly 25% smaller. I could have washed it more times to create a denser, thicker felt to work with, but I was running out of square inches didn't want a teeny-tiny purse.
Bonus Tutorial! Click on image to enlarge.
Are you ready for your bonus tutorial? Well look at the pic above! Hello easy-peasy no-sew fingerless gloves! Wear 'em pulled up or scrunched down. Embellish 'em with buttons, fabric flowers, lace, ruffles. You get the idea! Have fun and be sure to tell me all about it. (side note: It is really hard to take decent pictures of your own arm!)
The next step is to cut an opening into the sweater to create the handles. I used the lid to the oatmeal to trace a circle, but I think a half circle or oval would look great as well. I traced the circle, cut it out, and then traced the hole onto the other side of the sweater and cut it out as well. Next step is to trim off the neck. I trimmed it off in a gentle curve to create the top of my bag.
Now, if your sweater is a v-neck, you may run into trouble here. Be sure to cut your first hole below the "v" and line up the hole on the other side with it. If your v-neck is too low to make this work, you can always cut out a u-shape and sew together the tops of the "u" to create handles OR just round off the top and use something else for handles.
This step is optional, but I like the way it finishes and reinforces the handles. What you want to do is fold over the top edge of the handle towards the inside of the bag and stitch it in place. To ease the top edge around the curve, cut a few v-shaped notches into the top edge. I did 3 notches with a 1.5" gap. When I pinned the edge down, I scrunched together the notches. I sewed it down with a double row of straight stitches. You don't have to do the notches either. Instead, you could fold in a little pleat or two if your felt isn't too thick. 
Note: increase your stitch length when sewing through thick felt.
Adding a magnetic clasp is optional as well, but here's how I did it: I cut two squares of grey vinyl (any stiff fabric will work) and attached the clasps (one male, one female) to them. Then I sewed the patches of vinyl to the insides of the bag. I had to do this twice because the first time I sewed them off-center. So be careful! The final step is to turn your bag inside out and pin and stitch the bottom edge closed. I sewed mine straight across, but I think rounded corners would look nice too.


Now that the functional part of your purse is complete, it's time for you to decorate!  I used my die cutter on the scraps of sweater left over to cut out several flowers.  Then I used some leather studs to attach them to the purse.  The options are endless. . . you can do whatever you want!  Fabric yo-yos, buttons, zipper roses, felt flowers, lace, ruffles, etc.  Felt is sometimes difficult to push a needle through, so locate a thimble if the hand sewing gets tough.  Have fun and be sure to share your results with me!  Email a pic to ricochethandbags@hotmail.com and I'll post it on my blog. 
Happy crafting,
P.S.  I'm co-hosting the Retro Pillow Challenge!  Please click this button and check it out!


linking this post to these great parties:

Thursday, September 22, 2011

don't touch that dial!

I'm going out of town for a few days but wanted to leave you all with an idea of what's in the works for Ricochet and Away!

The Retro Pillow Challenge is ending Sept. 30th and
voting begins in October.

This is the gaudy dress I bought on sale to wear to
my dear cousin's wedding.  I assure you, it looks better
"on".  I also picked up this purple thrift store purse
and decorated it with a suede flower.  I'm going to make a little
tutorial on making flowers out of suede.

I've been referring to my die cutter a lot, but
haven't went into details about all the cool things you can do with it.
So, I'm working on a series of die-cutting projects and techniques.


I've been making fish purses lately and wanted to share
the story behind their conception.  Plus, I have a few tips on making your own
wacky-shaped zippered pouches.

As always, happy crafting and big hugs from Montana,

Sunday, September 18, 2011

Kristy's Farewell Gift...

Find the tutorial for this purse here.

Alas, my good friend Kristy has moved away.  :*(  We have many states between us now, but thanks to cell phones and facebook we can still bug each other throughout the day!  Kristy has many virtuous qualities that I appreciate dearly, but in one aspect, she is my "crafty-enabler-friend".  She got me hooked on die-cutting and card-making, 2 things that bring me so much satisfaction!  Kristy always has an extra craft store coupon to share, and she sends me links to the coolest crafty shopping sites.  Kristy has been a Stampin' Up demonstrator for a while now, so when I received an extra Stampin' Up catalog in the mail last month, I knew exactly what I wanted to do with it. 

I have been fooling around with paper weaving for the last few months and really wanted to figure out how to make a purse using this technique.   I was inspired by this fab purse made out of the Sunday funnies that I saw on BurdaStyle:

Comic_book_clutch_purse_large
[source]

And then I found this tutorial on how to weave a paper basket:


flashback-map-figG.jpg
[source]

And then I made these little guys:


They turned out cylinder-shaped, which is OK if you're making beer cozies and pencil cups.  However, I wanted a purse.  I needed something decidedly not cylinder-ish, but more envelope-like.  So instead of looking up another tutorial online, I decided to figure it out on my own.  I had a few paper cozies under my belt, so a wider-flatter shape shouldn't be too hard, right?  Wrong.  The shape I desire still eludes me, but I did happen upon this very peculiar shape instead:


What would you call this shape?  It's kind of like a 3-D hexagon with the top cut off.  But whatever you call it, I feel it made cute little conversation-piece handbag.  I made it out of the Stampin' Up mailer catalog to personalize it for Kristy.  I gave it a few coats of Mod Podge to toughen it up a bit.  The red alligator is from a thrifted purse.  I attached the flap and handle with leather studs. 


I'm happy with the finished product as is Miss Kristy.  If you would like to try some paper weaving, I have made a tutorial for the weaving portion of this purse here.  You will also find there other links to more paper weaving tutorials I've encountered on the web. 

If you haven't already, please check out the Retro Pillow Challenge:


As always, happy crafting and big hugs from Montana,


linking up at many of these cool parties:
http://debbie-debbiedoos.blogspot.com/
http://www.skiptomylou.org/
http://www.creatingreallyawesomefreethings.com/
http://craftomaniac.blogspot.com/
http://thediyshowoff.blogspot.com/
http://makingtheworldcuter.com/
http://sewcando.blogspot.com/
http://sumossweetstuff.blogspot.com/
http://craftskeepmesane.blogspot.com/
http://betweennapsontheporch.blogspot.com/
http://madincrafts.blogspot.com/
http://becolorful.typepad.com/becolorful/
http://soverycreative.blogspot.com/
http://sewchatty.blogspot.com/
http://jembellish.blogspot.com/
http://pinkapotamus.blogspot.com/
http://www.pollywantacrafter.com/
http://coloursdekor.blogspot.com/
http://embellishinglifeeveryday.blogspot.com
http://www.dittledattle.blogspot.com/
http://rtheyallyours.blogspot.com/
http://diyhshp.blogspot.com/
http://sewhappygeek.co.uk/
http://allthingsfee.blogspot.com/
http://singingthreelittlebirds.blogspot.com/
http://bluebirdsews.blogspot.com/p/eat-grow-sew.html
http://www.thegirlcreative.com/
http://www.beneaththerowantree.blogspot.com/
http://ppp-makeitmonday.blogspot.com/

Paper weaving tutorial...


The background for this purse can be found here.  You'll also find lots more pics of the purse.

Alright my friend, let me begin this tutorial by saying don't let all these pictures and steps intimidate you. I learned how to weave paper from a very basic tute without too much trouble. So my hope is that this tute will be MUCH easier for you to follow.  My goal was to create a tute that you could rely mainly on the photos to teach you the technique, so let me know how I did.  Please contact me  if anything is unclear.  Even though this project ultimately became a little purse, I'll often call it a "basket" in this post. 

Supplies:

Paper cut into 20 strips around 2" wide by 20" long.*
Any low-tack tape like painter's tape.**
Decoupage, acrylic medium.***
Paintbrush.
Scissors.
Clothes pins or paper clips.

*You could make it easier on yourself and use something that doesn't require all the cutting and folding.  I.e. sewer's measuring tape, bias tape, flat shoelaces, etc.
**Most tutes ask you to use clothespins to hold your weave. 
***I love the finished quality the "modge" podge lends, but it's not necessary.  Some white school glue to secure the finished edges would be be a good idea though. 
<><><>
1.  Fold your strips of paper in half and then fold each edge to the center fold.  Basically you are folding your strips of paper into fourths, but the cut edges are inside and out of view.
2.  Start weaving your strips together.  Over, under, over, under, trying to keep the strips perpendicular to each other.
3.  For this project, I am weaving 4 strips going one direction into 16 strips going the other direction.* 
4.  I center and even out all my strips, and arrange them so I have as tight a weave as I can manage.  Then, I tape it all together using my low-tack masking tape. 

*If you wish to make a box with a flat bottom, simply use an equal number (the number must be even) of strips in each direction.  For example 10 by 10 rather than 4 by 16.  I haven't attempted an odd number combination, i.e. 3 by 15 or 9 by 9, but intuitively I don't see how it will work.  That said, my curiosity is piqued and I have to test this theory!  Stay tuned....;-)

5.  Beginning on a side with 4 strips, I divide them in half and cross the two central strips.  You can see I've marked the two central strips blue and pink.  The outer strips are marked green and yellow.
6.  You can see how after the central strips are crossed, they are woven into each other.  This is hard to explain verbally, but hopefully the pictures will tell the story effectively.
7.  After I pull the weave tight, you can see I've formed a corner.  I place some tape to secure what I've woven so far and repeat this process on the opposite side with 4 strips.
8.  This is what it looks like so far with 2 opposite corners formed.

9.  Now we go through the same process, but with the sides with 16 strips of paper.  I take the two central strips and cross them.  You can tell which one crosses over the top by paying attention to what you have already woven and continuing the pattern.  It'll be obvious if you go over when you should have gone under, and easy enough to correct if you catch it at this point.  I've marked the one that weaves over the top in pink.
10.  You can see how I weave the pink strip through the adjacent strips and how another corner is forming.
11.  The next strip to weave is marked green and is woven right above the pink strip.
12.  After the green strip is done, I continue down the row of strips until all 8 strips from each side are interwoven.  Then, I pull them as tight as I can and secure with more tape.

Now each of the four corners have been created and this is what it looks like so far.  You can see that the bottom of our basket is not flat.  I originally started this project hoping to make a rectangle shaped purse.  I had woven many tall, square skyscraper shaped baskets by weaving with equal-numbered sides, i.e. 4 by 4 and 12 by 12.  I assumed that I would weave a rectangular, cereal box shaped basket if began with an unequal combination of strips, i.e. 4 by 16 or 6 by 12.  However, I was proved wrong.  I was pleased with my results none the less.  Serendipity: a happy accident!

<><><>
 When I formed the corners, I made all the strips change direction from perpendicular to a 45 degree angle.  The strips are all laying the correct directions, I just have to be systematic about how I weave them together.  I begin at the bottom (see pink strip) and weave it completely and move to the adjacent strip (see green strip) and begin again. 
13.  You can see in this pic that the tape is covering the corner I formed from 4 strips.  2 of the strips (pink and yellow) are ready to be woven into the 8 strips from the adjacent corner.
14.  Here I begun weaving the pink strip into the  8 adjacent strips.
15.  Here I have woven all 4 of my strips into the 8 adjacent strips.
16.  This is just another vantage point of the previous pic.  I had to pull it all tight and secure with tape.  Then flip it over and weave the other side as well.

I continue to weave until the strips are too short weave any more.  Here are a few pics of what it looks like so far.  At this point, I spend a lot of time making sure my weave is as tight as I can make it.  When that task is complete, I get out my "modge" podge and give the outside a coat.  I don't decoupage near the top edge as this portion is secured with tape and none of the edges are finished yet.  When that coat of decoupage is dry, I remove the tape from the inside that was securing the weave on the bottom.  Then I paint a coat of decoupage on the inside.  When that coat is dry, I am confident that when I remove all the remaining tape, the basket won't un-weave itself.

Now it's time I finished the top edge.  I located my shortest strips and those helped me determine where to create the edge. 
17.  I picked two strips that were crossing.  You can see the pink is crossed behind the green strip.
18.  I fold the pink strip over the green strip.
19.  I trim the pink strip at about 3/4" from the fold. (Or the width of 1.5 strips.)
20.  I tuck the pink strip under the green strip, hiding the cut end.  I repeat this all the way around the basket.

21.  When all the trimmed strips are tucked away, you get something that looks like this.
22.  I trimmed the remaining strips.
23.  When all the long strips are trimmed away, it looked like this.
24.  To ensure that nothing will unravel, I applied some glue under all the tucked strips and secured them with clothes pins to dry nice and tight.  Paper clips would work as well.

After that was dry I applied one more coat of decoupage inside and outside to cover the whole shebang.  The resulting basket has a very unique shape.  What would you call it?  A spiky strawberry?  A flat-topped diamond?  I'd love to hear your ideas on this!
I've compiled a short list of paper weaving tutorials I've run across for your perusal:

flashback-map-figG.jpg
[source]
This is the tutorial I learned paper weaving from.  It had around 10 photos and no decoupaging.  As you can see, the weave creates diamond shaped patterns on the sides of the vessel.


A charming basket (or comfy pet bed) is crafted from an issue of the Sunday New York Times. Recycling never looked so good.
[source]

Here's a great example of another way to weave paper.  Notice the weave creates square shaped patterns on the sides of the box.  It's a pretty good tute.  You can find it here.  I use a box to hold my old newspapers awaiting recycling.  Wouldn't it be cool if I made a newspaper recycling box out of recycled newspapers? 


Easy-Weave Newsprint Basket
[source]


This is a good tutorial for making cylinders.  You form them around a cup.  I think it would make a great project for me to do with my kids.  You can find it here


Besides weaving paper, I'm co-hosting and participating in the Retro Pillow Challenge.  I hope you'll click on this button and visit the homepage.  The challenge ends Sept. 30th so you still have time to join us!

Thank you all for making this blog so fun for me!  I love hearing from you and meeting new crafters from all over the world.
Happy crafting and big hugs from Montana,


Saturday, September 17, 2011

Please check out my first guest post!


The wonderful Miss Jill from Creating my Way to Success has given me the honor of guest posting on her lovely blog.  Please click here and check it out!  This post also made it on the felting section of CraftGossip.com.  That is very cool, indeed.  If you are unfamiliar, you should really take the time to peruse this crafty site.  You can find the CraftGossip.com post here.

As seen on CraftGossip.com

Happy crafting and big hugs from Montana,
Related Posts Plugin for WordPress, Blogger...