Sunday, September 30, 2012

Vote: Fab Folds Sewing Challenge


September's challenge was to:
Successfully execute pleating, pintucking and/or smocking in a finished piece.   
I've featured all the finished entries in this post so be sure to scroll down past the poll and see the projects in greater detail and follow the links to their respective blogs.  

SELECT YOUR TOP 3 ENTRIES AND PRESS VOTE.  
Anyone can vote once a day throughout October 2012.
The order of the entries is random and changes every time you vote.


Nine participants from literally ALL OVER THE WORLD chose to accept this challenge.  Everyone put in a lot of effort and showed loads of heart and skill, and 8 were able to meet the challenge.  Just look at what they achieved:


Anshu from Blooms and Bugs made this cute Big Bow Dress.
It features a central pleat with that draws your eye to sweet bow at the top.
Anshu chose a rich, luxurious fabric that contrasts 
beautifully with a fun print for the lining.
Please visit her blog and check out all her wonderful tutorials.
Anshu's post about this dress can be found HERE.
Bella from Nisabell Necessary made this incredible smocked book cover.
She pulled out all the stops when it came to adding details.
The intricate smocking is decorated with tiny beaded flowers--what dedication!
Please visit her blog and check out her fabulous tutorials.
Bella posted about her book cover HERE and HERE.

Diya from The Hobby Harbor made this Yummy Yellow Skirt.
It features pockets, decorative buttons, and a rows pintucking across the bottom.
Diya chose polka-dotted fabric to contrast with the fun yellow--a genius choice, very effective!
Please visit her blog and check out her many DIY ideas.  
Diya blogged about her skirt HERE.

Marisa from Passion et Courture created this striking smocked pilllow.
She started used canadian smocking which is kind of cool since she's from Montreal!
The fabric had a subtle stripe or plaid that created really cool ombre effect when smocked.
Please check out her blog where she shows you how she made tons of great projects.
Marisa blogged about her pillow HERE.

Mira from Sewing the Littleheart Collection made a tunic with leggings.
She managed to successfully include pintucks, pleats, and smocking all in one outfit!
All those techniques were perfectly executed (in knits no less!) and smartly placed--great  job!
Please check out Mira's blog packed with lots of handy tutorials.
Mira shows you how to recreate this outfit HERE.

Pam from Threading My Way created this pretty Pintucked Skirt.
According to Pam, those tiny 1/16" pintucks took a lot of patience and "Maths"!
The effect is very subtle, but those details transform a simple garment into something more.
Please check out Pam's blog, her linky parties, and tutorials are just great.
Pam blogged about her skirt HERE.
Patty from Make it Cozee met my challenge twice!
First she made this fun pintucked clutch with all kinds of pockets inside, and then she made this darling pintucked pillowcase dress.
Please check out Patty's many tutorials, recipes, and much more!
She blogged about her clutch HERE and her dress HERE.
Rachel and Donna from Once Upon a Sewing Machine created a Market Place Bag.
This mother/daughter team made a tote featuring an inner pocket with an inverted pleat and an outer pocket with smocking.
Made with pretty floral prints, this bag also has key clip and a band to keep it rolled up when not in use.
Please check out all their great sewing tutorials HERE.
They blogged about their bag HERE.
Even the hostess (me!) managed to meet the challenge.
I made a little gingham pouch with a row of smocking and an even smaller pouch with some wavy pleats.
I blogged about the gingham pouch HERE and the pleated pouch HERE.


I'd like to give BIG HUGS and THANK YOUs to all the participants.  This was a really tough challenge and you all met it with style and surprising skill.  The best thing, in my opinion, about these challenges is seeing how differently participants approach, design, and solve a problem.  I mean, we're all a bunch of lady bloggers who like to sew, who were given the exact same challenge, but look how unique all the entries are!  I'm amazed and inspired by this.  You all worked so hard, and I'm so proud of what we've achieved!

Here's a handy button you can use to promote the voting portion of this challenge:
Vote: Fab Folds Challenge

The entries with the most votes will win a super-dooper shiny badge and all the bragging rights that go with it!
Good luck and thanks again!

If you're interested in joining a fun sewing challenge, just click on the "challenge" button on my menu bar and see what the current challenge is.

Happy crafting and big hugs from Montana,
Pin It

Monday, September 24, 2012

Petite Pleated Pouch

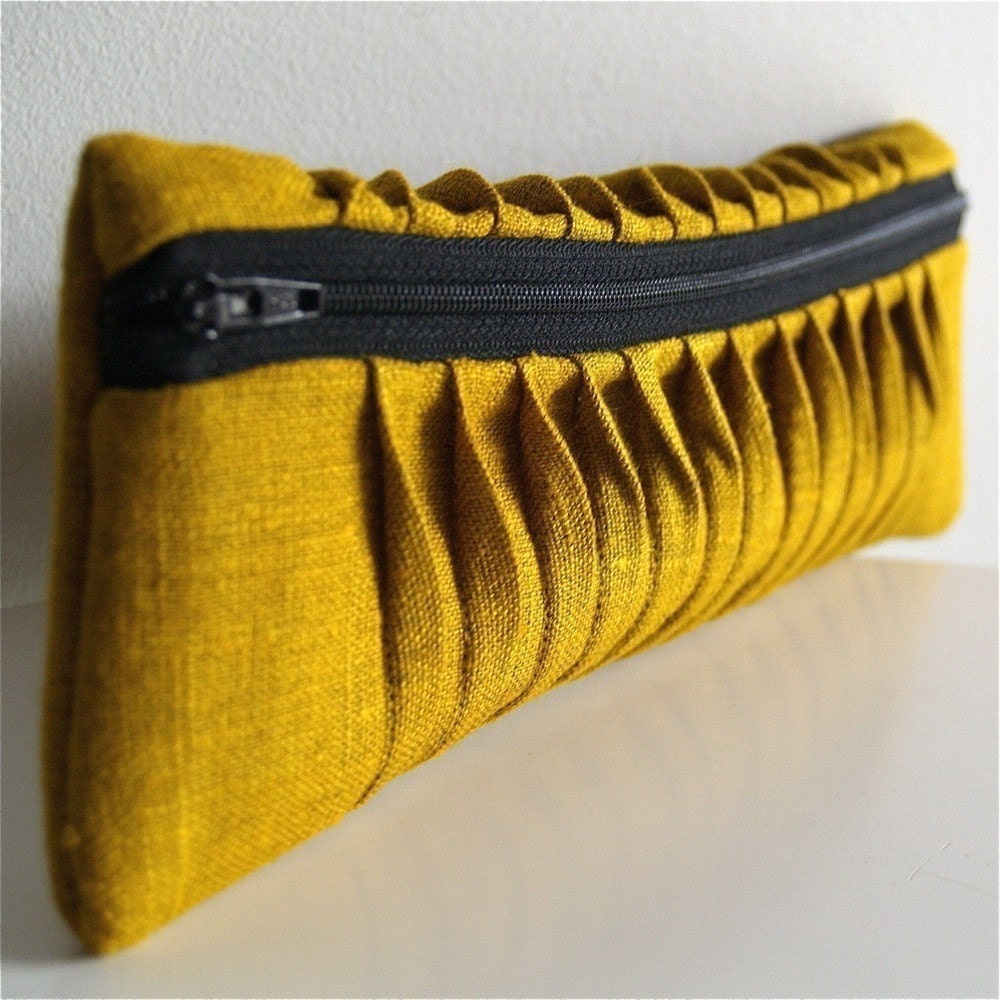
 The inspiration for this little pouch came from a another zippered pouch I saw on Pinterest:
clutch - golden wavy pleats
wavey pleated clutch yorktownroad etsy store
 I was also inspired by this quilt block:
textured quilt block TeresaDownUnder WP blog

And so I fooled around with some fabric and this little guy is what I come up with:

 I began with a long strip of this burgundy fabric.  I don't know what it's called, but it's rather thick, slick, shiny, and frays like mad.  Another cool aspect is that the fabric has a holographic effect--it looks black if you tilt it to the right angle. I'm sure it would be perfect for formal dresses or maybe a dressy fitted top. Of course I wasn't planning on making either when I picked it up out of the Red Tag bin at JoAnn's.

I made two pleat-cheats which consisted of cardboard strips measuring 1.25" and  0.75".  Why make 2 different sizes?  Well, tried to make then all the same size, but then I ended up with something that wouldn't lay flat.  One side of the pleat needs to be longer than the other side if you want them to lay flat like this:

Here's a handy-dandy diagram to show you what I mean:

 I stitched down one side and flipped the pleats on the other side to lay the opposite direction so I could stitch that side as well:

I added some fabric to each side and it ended up looking a lot like the quilt block I showed earlier:

I trimmed my version of the quilt block and fiddled around with it until I found something I liked.  I was really pleased with how the pleats looked when I folded the block in half.  So I set out to make a little zippered pouch.  

Now, most of the time when you make zippered pouches, you're dealing with a front and back.  This pouch I made is slightly different because the outside is all one piece.  Of course, I didn't take pics of the whole process (slapping forehead) but there are oodles of tutorials on zippered pouches.  Why make another one?  

I will say, the pouch being tiny like it is sure made top-stitching around the zipper a major pain in the arse.  I won't be trying this again in these proportions any time soon (never!).  I did finish it though, and I love how it turned out.

I made this pouch for the Fab Folds Sewing Challenge.  I host a sewing challenge every other month and September's challenge was to make something using pleats, pin-tucks, or smocking.  It's a fun way to meet new bloggers, learn new sewing techniques, and get totally inspired!  I have a challenge page you can go to on my menu bar and visit previous challenges and see what's current now.  
Fab Folds Sewing Challenge

I'm curious.  What do you know about pleating, pin-tucking, and smocking?  What have you been sewing lately?  What do you think about my Petite Pleated Pouch?  Have you ever been in an online sewing challenge?   
Happy crafting and big hugs from Montana,

Pin It


Monday, September 17, 2012

Smocking on gingham zippered pouch


My youngest turned 6 in August.  Yes.  Six!!!  In lieu of a big themed party, my daughter wanted to ride a horse for her birthday.  It was a tall order for Mr. Ricochet and me, but we pulled it off.  Our not-so-little girl got her birthday wish granted and just look how thrilled she was:


As a thank you to my horse-owner-friend, the kids wrote notes and decorated cards, while I sewed a pretty pink pouch.  You can barely see her in the photo above, but it's clear my horse-owner-friend likes the color pink.  So I found a pink gingham and a coordinating home decor canvas print to make a little zippered pouch.  Here's the tutorial: 
(Keep in mind that I sew in a basement with virtually no natural light.  
So most of tutorial photos are not even close to portraying the true colors of the fabrics.)
I'm hosting The Fab Fold Sewing Challenge this month (9/12) so I have pleats, pin-tucks, and smocking on the brain.  I decided to add a row of canadian smocking to the gingham as a fun detail.  

The photos above show how it looks on the front and back post-smocking.  I think it looks a little like french braided hair.  But with the gingham having such a strong pattern of it's own, I think the smocking also looks a bit like a puckered up wrinkle in the fabric.  That said, it turned out to be a cool looking pucker-y wrinkle that I decided to stick with.  However, next time I'm trying it on a solid colored fabric.  

The best tutorial I have found on canadian smocking can be found HERE.

After the smocking, the rectangle of gingham that I started with was obviously no longer a rectangle.  I traced that shape and cut out another piece of gingham to use for the other side of the pouch.  Then I added a band of the canvas to the bottom edges of the ginghams.  When I had both sides complete, I traced those sides on more gingham to make a lining. Then, it was zipper time.
  1. Here's a peek at how I add fabric ends on my zippers.  I sandwich the zipper in between two rectangles of right-sides-together fabric.  I pin and stitch right through all the layers.  I use a bit of blue tape to hold the edges of the zipper together on one side.  You can see all the other unconventional ways I use blue tape in sewing HERE.
  2. This shows how the rectangles of fabric have been folded back and pressed wrong-sides-together with the zipper in between.  I show more pics and explain this procedure in more detail HERE.   
  3. To install the zipper I start by pinning the right side of the zipper to the right side of the front panel.  I use my zipper foot and stitch along the edge.  
  4. This is what it looks like after the outer front panel has been stitched to the zipper and pressed away from the zipper opening.  I repeat the process for the other outer panel and then each of the lining pieces in turn.  *note: many people like to sandwich the zip between the outer fabric and the lining and make one line of stitching, but I get a straighter line of stitching if I can see the zip when I'm sewing.
  5. After all the panels (outer and lining) have been attached to the zip and pressed away from it, this is what the outside looks like.
  6. This what the inside looks like.
  7. This shows how I top-stitched all the way around the zip.  Neat and tidy!
  8. This shows some studs I added to the other side of the pouch.
After the zip was in, I pinned the right sides of outer fabric together, and did the same to the lining.  Another use for blue tape: a reminder to leave an opening in the lining so I could pull the bag right-side-out.
After stitching around the perimeter, I worked on making a flat bottom for the pouch.  The next photo down shows how I squared off the bottom of the bag.

  1. Here's the opening I left in the lining.  I folded back the edges and pressed them back to line up with the seam on each side.
  2. Here's the bag lining right-side-out.  The creases I ironed on the edge of the opening make it easier for me to stitch the hole closed.

I squared off the bottom of the bag by lining up the side seams with the bottom seam.  
I pinned the corner, marked and stitched across as show, and then I trimmed off the corners.  
I did this to the outer and lining fabrics.  Now the bag will sit flat.
I printed out a little picture of horseshoe and carefully cut it out.  Then I used Glitter Mod Podge to adhere it to the front of a clear plastic pendant.  I used Dimensional Magic to add a thick glossy finish over the horseshoe.  I let it dry overnight and used it as a zipper pull.  I've heard you can just add regular glitter to Mod Podge for a similar effect, but the pre-made Glitter Mod Podge is very pretty.  It's not just silver glitter, it's very fine-sized iridescent glitter--super glam and rainbowlicious!


So here it is, all finished and shown from a few different angles.

I'd love to hear from you, so leave a comment and tell me about what you're working on, what your zipper tips are, or how you celebrate birthdays at your house.

I would also like to invite to join us in The Fab Folds Sewing Challenge during Sept. '12.  If you're reading this after September, just check out my challenge page and see what the current challenge is.
Fab Folds Sewing Challenge

Happy crafting and big hugs from Montana,
Pin It

Tuesday, September 11, 2012

Fall Means Tomato Jam Time at my House!

This is a Sponsored post written by me on behalf of Scotts Miracle-Gro for SocialSpark. All opinions are 100% mine.

I love tomatoes.  I love to grow them.  I love to eat them.  Sadly, Montana has a very short growing season so I need to use it wisely.  One of the ways I make the most of the season is to ensure I have the best possible soil.  To achieve that I make my own compost out of all the vegetable food waste and egg shells from my house and some lawn clippings and leaves.  Once my waste has been converted to a rich soil I add Miracle-Gro.

MiracleGro Logo(1).jpg

The thing about Fall in Montana is that it is unpredictable at best and brutal on vegetable gardens.  I try to combat the cold nights be covering up my plants and adding a bit of extra fertilizer to boost the last of my baby tomatoes to maturity before they freeze.  I like to use the liquidfeed Miracle-Gro:

Liquafeed_Advanced.JPG

Once I havest about 5 pounds of tomatoes, I like to make a batch of tomato jam.  I found this recipe via Pinterest last year and it was so good I'm making it again this year.  Now tomato jam is not for PB&Js.  It really isn't that great on plain toast either.  But it is excellent on toasted cheese sandwiches, any grilled meats or fish, or poured over cream cheese and served with crackers.  

Check out the recipe HERE.  And here's a pic of my latest batch:

Go to the link I provided get the complete recipe, but just to give you an idea what kind of flavors wer're talking about, here's a list of the ingredients: yellow tomatoes, sugar, lemon juice, lemon zest, and basil.  In the pic I have whole grain bread with a slice of havarti cheese on it.  The tomato jam made it soooo much tastier.  

The Miracle-Gro website has lots of Fall gardening tips.  You can also visit and like their Miracle-Gro Facebook page to keep informed about all their products and projects to go with them.  Find beauty in the Fall with Miracle-Gro's extensive collection of Fall planting projects specific to your region.  Advertisement

Visit Sponsor's Site

Monday, September 10, 2012

A new sweet treat

This is a Sponsored post written by me on behalf of Nectresse™ Sweetener for SocialSpark. All opinions are 100% mine.

Nectresse product family.jpg

One of the cool things about blogging is when you get free products in the mail to try out.  Recently I received a sample of NECTRESSE™Sweetener.  I went to FREE sample of NECTRESSE™Sweetener and several days later, a package arrived!  Yay for free stuff!  You should click the link and get your own free sample.  What have you got to lose?

Nectresse is an all-natural sweetener.  In fact it is the only 100% natural sweetener made from fruit--the monk fruit found in Asia.  Nectresse has no calories, so I was curious about whether or not it tasted any good.  The answer:  YES!!  it was super tastey.  No chemically aftertaste, just pure sweetness very much like real sugar.

I drink iced tea or hot tea all day long.  I like it sweet, but I drink so much of it that I don't really need the extra calories.  I ripped open a packet of Nectresse and poured half into my iced tea.  It dissolved completely with a few stirs.  The taste was really good!  I'm glad I only started with half a package though, because Nectresse is super concentrated.  A little goes a long way.  

I'm throwing the rest of the packets in my purse and I'm going to buy the canister of Nectresse to keep at home.  The website has a ton of recipes I want to try.  You can take a look at all the recipes here: http://www.nectresse.com/recipes.

Once I decide Nectresse was a tastey and healthy sugar substitue, i decided to test it out on the kidlets.  Check out my own super simple recipe:

I gave this sweet treat to my kids as their after school snack.  They can't wait until I make it again.  Next time I'm subbing the vanilla extract for cinnamon and tossing it with apple slices.  I was thinking caramel flavoring would be really good with bananas.  We eat a LOT of fruit in our house, so it's nice to mix it up a bit and try something new.  Thanks to Nectresse for all the free stuff!!!


Lisa Ling also made a cool YouTube tesimonial about Nectresse.  You can see it here:


Visit Sponsor's Site

Asymmetrical Place-mat Purse

A.k.a. the wonky envelope purse.

This is quick and easy purse to sew.  If you have made lined purses before,(pulling the entire purse through an opening in the lining) then this purse will take no time at all to sew.  If you're totally unfamiliar with sewing linings into purses, check out this tutorial by  Patty at Make it Cozee.  She takes great photos (much better than mine!) and let's the pictures tell the story.  So all you visual learners will totally dig this tute.


Easy Instructions:
  1. Check out my diagram and see how I gave an ordinary placemat a wonky asymmetrical fold.  Just play around with it until you get a shape you like.  Press down the folds and trim off the overlapping edges.
  2. Use the resulting placemat shape to cut out your lining fabric.  Remember to make sure you are cutting out the correct side of the lining.  With asymmetrical shapes it can get tricky!
  3. Press corresponding folds into your lining.  Now you can add pockets and the male half of a magnetic snap to your lining. 
  4. Stitch the side edges of your purse, right sides together.  According to my diagram, stitch the red edges together and the blue edges together.  Do the same thing to the lining, right sides together.
  5. Turn you purse right side out and place it inside your lining, right sides together.  Carefully pin the edges of the purse and lining together.
  6. Stitch all the way around the pinned edges, but leave a 3 inch (or so) opening on the front edge (the edge under the flap). Trim off the seam allowances at the corners.  
  7. Pull the fabric through the opening and situate until it looks like a real purse.   Press all the edges neat and tidy.  (See Cozee's tutorial for great instruction and photos.)
  8. Mark on the front of the purse where the female half of the magnetic snap should be placed.  Reaching through the opening in the front edge, attach the snap to the front of the purse.  See?  No measuring!
  9. You can hand sew the opening closed now, though I usually don't.  Then top stitch all the way around all the edges.  That's it!  You're done!
You could add some dimension to the bag by squaring off the bottom at step 4. The tutorial I mentioned in teh first paragraph also shows how to square off the bottom of the bag.  Check out Patty's tutorial HERE.   Or you could make a strap or handle and add it to the outer fabric at step 4 as well.  Adding some extra structure with interfacing or fusible fleece or Peltex/Timetex is another option.  A simple purse like this is also just crying out for fabric flowers or silver studs don't you think?

Did you notice the cool pintucks/mexican pleating on the placemat?  This corresponds with my current sewing challenge:  The Fab Fold Challenge.  So if you're reading this before 10-30-12, press this button and check out the challenge homepage:
Fab Folds Sewing Challenge

So what do you think?  Could you use a little wonky envelope purse?  How would you tweak the idea and make it your own?

Happy crafting and big hugs from Montana,
Pin It
Related Posts Plugin for WordPress, Blogger...