Showing posts with label embellishing. Show all posts
Wednesday, December 5, 2012
DIY Foam Ball Ornaments
When I was in Girl Scouts (many years ago!) we hosted an annual Christmas Bazaar for the community to buy & sell their crafts and baked goods. One year my troop made ornaments to sell. We started with ready-made satin-covered foam ball ornaments.
Sunday, November 18, 2012
Thursday, November 15, 2012
Pull-thru Scarf
Hello my lovely readers!
My current sewing challenge is the "Ring Your Neck" Scarf-Making Challenge. You can sign up now if you think you can make a scarf by the end of November. Anyone can join in! If you look at my right sidebar, you'll see the list of all the challenge participants that have blogs or websites. I encourage you to visit them and see what their recent projects.
Labels:
clothing,
embellishing,
scarves,
sewing,
tutorial
Monday, October 8, 2012
Pattern Review: M5822
I needed to make a diaper bag to be auctioned off at a charity benefit. This lime green tote bag is what I came up with. I started with a pattern by designer Kay Whitt. You can see another Kay Whitt review I wrote HERE. I love her clean designs that just cry out for bold fabric choices. Here's a pic of the pattern I used for the diaper bag:
This pattern from McCall's Fashion Accessories line allows you to make a tote bag in 3 different sizes. The tote features a recessed zipper, an interior pocket, and two exterior pockets. The pattern suggests you use novelty cotton fabrics or cotton blends, plus buckram (Coarse linen or other cloth stiffened with gum or paste and used typically as interfacing and in bookbinding. [dictionary def.]) and fleece for interfacing.
Of course it is almost painful for me to follow a pattern exactly without tweaking it just bit. I'm the same way with recipes--it must be a personal defect. Anyway, the alterations I made were:
I made a patch pocket that mimicked the shape of the bag. The pattern included a similar pocket, but I didn't feel like going through the trouble of cutting it out. I added some bias tape to the top edge of the pocket. With the excess bias tape, I attached a toggle clasp that I stole from a used purse. This was a fast and easy way to include some handy hardware. I attached the pocket to the lining with a double row of stitching in a light pink thread.
For the pockets on the other side, I simply cut a panel exactly the same shape as the lining, but about 5 inches shorter. I finished the edge with bias tape again and basted the edges that would eventually be enclosed in the side seams. I divided the pocket in half with row of stitching. I knew the top of the center stitching needed to be very secure because it would experience a lot stress with regular use. So instead of sewing a little square on the bias tape, I stitched a couple big hearts. I didn't stop there either. I took ended up adding some embroidery as well. You can also see I added a row of my Ricochet ribbon that I blogged about a loooooooong time ago.
In straying from the recommended fabrics, I had to do some things differently.
![]() |
| Kay Whitt Designs Tote Bag in Three Sizes M5822 [source] |
Of course it is almost painful for me to follow a pattern exactly without tweaking it just bit. I'm the same way with recipes--it must be a personal defect. Anyway, the alterations I made were:
- Skip the zip. The zip would be nice for a purse, but diaper bags need to be accessible. The tote is tapered so the opening is already small. A zip would have made the opening even smaller. It would have been very difficult to find important things like binkies and nail clippers in this deep dark bag.
- Exchange novelty cotton fabrics for vinyl and corduroy. The lime green vinyl and funky corduroy print were dying to be used together! Plus, I had this soft brown vinyl that I used for the handles that went perfectly.
- Customize the interior pockets. One single patch pocket for a diaper bag is not optimal.
- Exchange buckram and fleece for Peltex heavy interfacing.
Here's some pics of my customized interior pockets.
You can really tell which pics were taken in natural light and which were taken in my craft dungeon:
I made a patch pocket that mimicked the shape of the bag. The pattern included a similar pocket, but I didn't feel like going through the trouble of cutting it out. I added some bias tape to the top edge of the pocket. With the excess bias tape, I attached a toggle clasp that I stole from a used purse. This was a fast and easy way to include some handy hardware. I attached the pocket to the lining with a double row of stitching in a light pink thread.
For the pockets on the other side, I simply cut a panel exactly the same shape as the lining, but about 5 inches shorter. I finished the edge with bias tape again and basted the edges that would eventually be enclosed in the side seams. I divided the pocket in half with row of stitching. I knew the top of the center stitching needed to be very secure because it would experience a lot stress with regular use. So instead of sewing a little square on the bias tape, I stitched a couple big hearts. I didn't stop there either. I took ended up adding some embroidery as well. You can also see I added a row of my Ricochet ribbon that I blogged about a loooooooong time ago.
In straying from the recommended fabrics, I had to do some things differently.
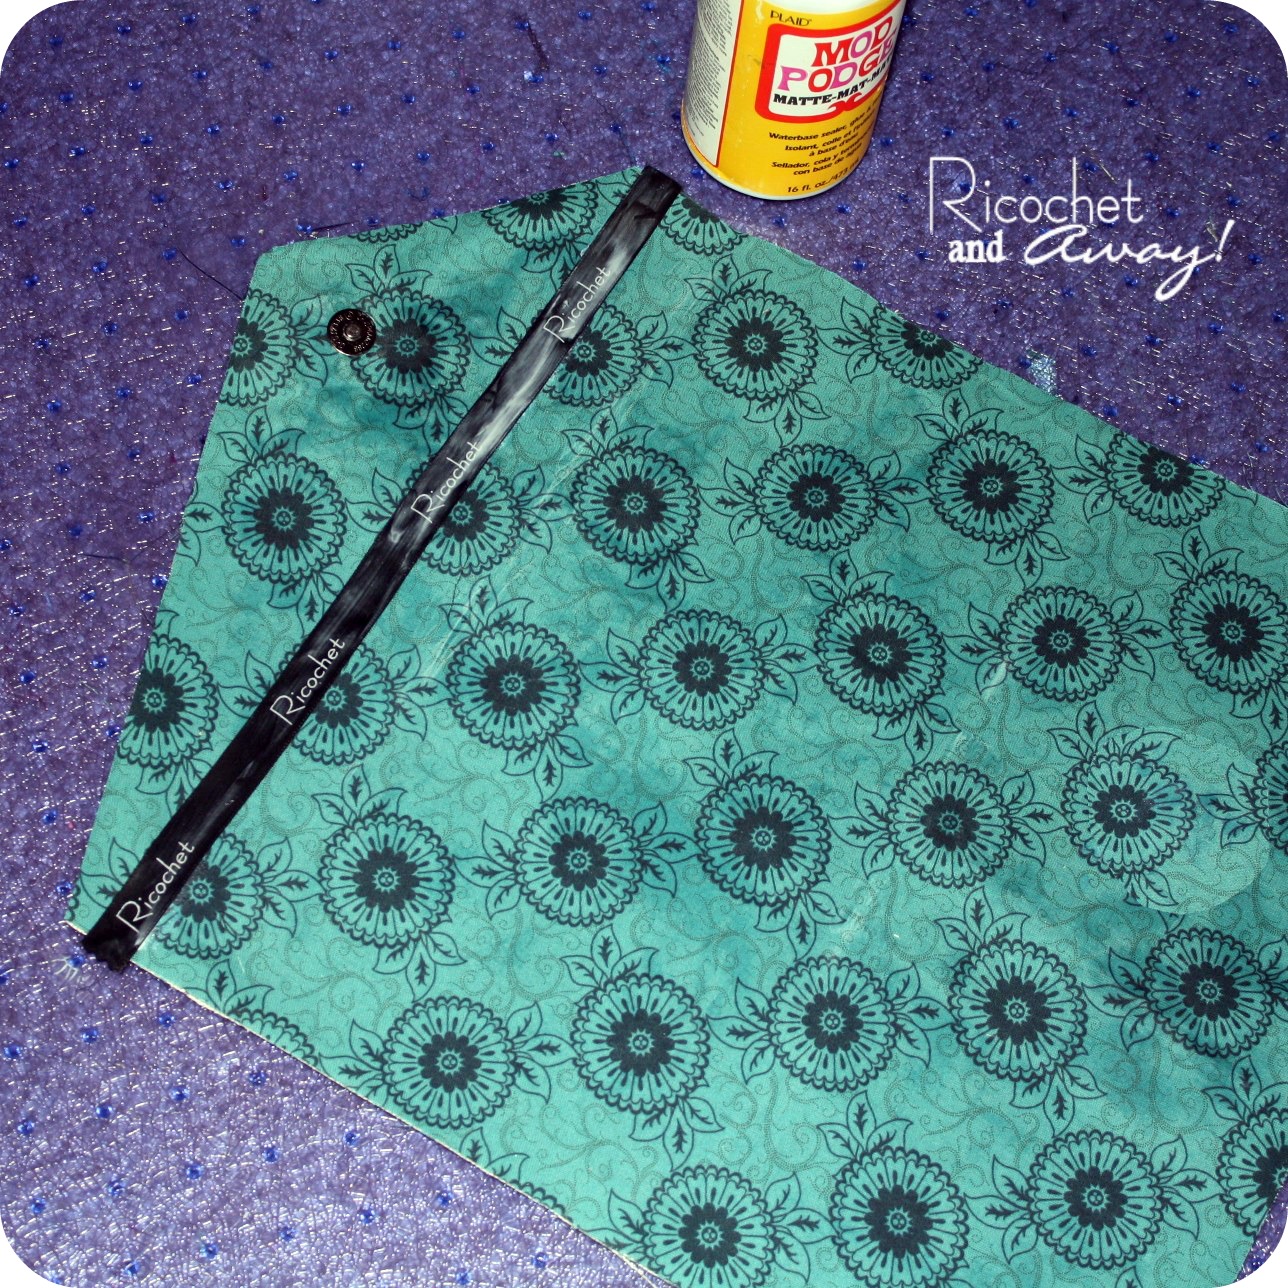
- You can't iron vinyl and Peltex sucks up glue. Since I couldn't iron-on the Peltex to the vinyl I decided to glue it on. I used regular old Tacky Glue in the gold bottle. The Peltex sucked it right up and it didn't stick a lick. So I took some Mod Podge and coated a side of the Peltex with it, effectively sealing it up or priming it to take the glue. After it dried, I used the Tacky Glue with great results!
- Regular polyester thread and 80/12 needles weren't going to cut it. To effectively sew the vinyl I switched to a heavy-duty 110/18 needle, heavy-duty top-stitching thread, and increased my stitch length to 4. [I sew on a Singer 4411 HD]
- Watch out for bulky seams! The curved sides and the thickness of the vinyl and corduroy were hard enough to sew without adding the bulk of the Peltex into the seams as well. To remedy this, I trimmed all the Peltex to fit within the seam allowances.
In conclusion, here are the pros and cons, IMHO, of M5822:
Pros:
- Cute shape.
- Simple design.
- Easy to follow instructions.
- Easily customized.
- Comes in 3 sizes. I used the largest size.
Cons:
- Finishing the top with a strip of binding was tedious. I couldn't risk making extra holes in my vinyl so I ended up hand sewing the binding to the lining. I prefer the method were you stitch the lining to the bag, right sides together, and then pull the whole thing through a opening in the lining.
- The smaller 2 sizes don't appeal to me. I would have preferred a even larger size though.
- The recessed zipper would make the opening very small, even in the largest size. I suggest an inner tab with a magnetic clasp instead.

The tote is easy enough to sew that a reasonably knowledgeable sewist could duplicate it without having to buy the pattern. Once you made the front/back panel, all the rest of the pieces are rectangles. Easy, right?
I'm thinking about making my own tote based off this pattern from the brown vinyl I used for the handles. I have enough of the green vinyl to use as an accent. Neon colors are so "in" right now. I hope I can finish and use my tote before they are "out"!!!
Hope you all find this review useful. I would love some more pattern suggestions for large tote bags, if you have any. Are any you Kay Whitt fans like myself? What's the last pattern you've sewn?
Happy crafting and big hugs from Montana,
Monday, April 16, 2012
Pants to Shorts Refashion
I have been in a I-can't-believe-how-fast-my-kids-go-through-clothes state of shock these past few weeks. Summer is approaching, and my kids grew like weeds over the school year. They are not going to be able to wear very many clothes from last summer. I've been patching jeans like crazy. The jeans that are getting too short, I'm converting into capris and shorts.
I wanted to create some shorts for my daughter that were a little fancier than your average cut-offs. I was thinking about trying some applique or free motion stitching, but couldn't get inspired. I had a pack of adhesive stencils sitting on my desk just crying out be utilized, so decided to give 'em a try. The end product turned out to be much more complicated than I first anticipated, but I had so much fun "playing" that it was like I didn't want the project to end. Has that ever happened to you?
Check out my latest jeans to shorts conversion:
![]() |
| I added some detail with a fine point sharpie, a totally unnecessary step. |
4 Easy steps:
- Cut off pants legs and finish with bias tape. You can find a good bias tape how-to HERE.
- Get a hold of some stencils and paint. I was very happy with Martha Stewart's adhesive stencil set and multi purpose craft paint. (The adhesive stencils are the bomb! I am stoked to get my hands on some more! Freezer paper stencils would be a great choice as well. Any acrylic or fabric paint will work.)
- Plan out your design and paint away! (two coats work best)
- Let it dry and heat set with your iron. (30 seconds on cotton setting.)
![]() |
| Yes, I know this is sideways. Help! |

If you all are reading this during April 2012, please vote for your favorite Typography Challenge project:
Happy crafting and big hug from Montana,
Thursday, April 12, 2012
Painted Patches: A cool project for boys.
When my son was younger, he would grow out of his jeans before he could wear out the knees. Now that he's older and plays a bit rougher, the knees of his jeans don't stand a chance.
I began repairing the holes with iron-on patches. After a day at play or one round through the washing machine, the edges of the patches would curl up and my son would pick at them until they fell off completely. I tried placing the patch on the inside of the knee with similar results. I tried re-ironing the patches after every washing and adding some fusible webbing under the patches for extra adhesion, but nothing fixed the problem. The iron-on patches were only a temporary solution, I found.
I knew I had 4 choices:
- Leave the holes unpatched. (My son could care less to be honest.)
- Buy new jeans. (That would feel like giving up.)
- Hand sew the edges of the patches. (I did this once. Once was enough.)
- Figure out how to machine sew the patches. (OK, you know I chose this one!)
The obvious problem with sewing patches on little boys' jeans is that the legs are so dang narrow you can't slide them over your sewing machine. The holes are in the middle of the garment so you can't bunch up the fabric enough to avoid sewing through both sides of the pant leg. That didn't stop me trying though. Curse words could be heard streaming from my craft room throughout that time.
So here's what I did:
- I applied an iron-on patch over the hole.
- I ripped open the outer seam (the seam that was not top-stitched) of the pant leg. I ripped just enough so I could slide the bed of my machine through the opening.
- I used a strong top-stitching thread to sew down the patch. You can see from the photos that I sewed several parallel lines through the patch.
- I turned the pants inside out and sewed up the seam I ripped.
- I took a black sharpie and drew some little pictures on the patches.
- I used some Martha Stewart Multi-Surface acrylic paint (Mother of Pearl) to enhance the drawings.
- After drying and curing overnight, I washed and dried the jeans as I normally would. You can see the results of the washing in the photos.
![]() |
| [source] |
So what do you think? Do you know a little boy who could benefit from this project? I know my daughter is eager to make some holes in her jeans...
If you're reading this post before April 30, 2012, would you please vote for your favorite Typography Challenge project HERE? Anyone can vote once per day though out April. The voting page also links to each project and many of them have tutorials.
Happy crafting and big hugs from Montana,
Tuesday, January 24, 2012
Naughty Notions Clutch is done!
|
In case you're new to my blog, I've been co-hosting sewing challenges with my blogging friend Keren from sew la vie. Our first challenge was the Retro Pillow Challenge, then we did the Solids-Only Tote Challenge, and our current challenge is called Naughty Notions. The guidelines for this challenge are simple, create a clutch or small purse showcasing sewing notions as your embellishments.
|
My supplies:
Vinyl, wide lace
assorted buttons
leather studs
craft wire, bias tape
lining fabric, zipper
magnetic snap
Mod Podge, velvet ribbon
|
My tools:
ruler, paper clips
rotary cutter
scissors
paint brush
sewing machine
needle nose pliers
big needle
|
- The first thing I did was cut a perfect rectangle from vinyl. Then, I took some wide black lace and tacked it on to the right side of the vinyl with a stripe of Mod Podge. I started with a thin line of 'podge so I could tweak the positioning of my lace until I was sure it was exactly where I wanted it.
- Next, I saturated the lace with 'podge, avoiding the vinyl, and allowed it to dry.
- Last, after the 'podge was completely dry, I stitched down the edges of the lace.
- I trimmed two corners off to form the edge of the flap.
- I needed to know where the folds would take place so I made some creases with paper clips because you can't iron vinyl. That gave me some guidelines so I could plan my embellishments and where my magnetic clasp would go.
- I started with attaching a row of buttons to the space between the laces. I used my big needle to pierce holes in the vinyl and a fine gauged craft wire to secure the buttons. I found the wire to be much easier than thread for this project. I had some petal/leaf-shaped pieces of black suede left over from a previous project, and I attached them to the vinyl with round leather studs.
- I don't have an in-process photo of it, but I added the female side of my magnetic clasp to the vinyl. I also ended up putting an additional stud in between each of the buttons. Ouch! My fingers were so sore!
I found this pretty turquoise cotton to use for the lining. I cut it to size and added the male side of the magnetic clasp. Just like I did in my envelope wristlet tutorial, I got out the Mod Podge and adhered the lining directly to the the wrong side of the vinyl. As you can imagine, the reverse side of the vinyl was very bumpy and pokey with all the leather studs and twisted wire. The decoupaging secured and contained all the sharp metal, but the finished surface is far from smooth. Next time I try this, I'm going to attempt to quilt my lining fabric to a thinner piece of peltx or timtex and nix the Mod Podge.
|
- While the 'podge was drying, I made a zippered pouch for the interior of my clutch. I sewed together two lengths of lace as well.
- The lace was sewn onto the back of the zippered pouch to form a mesh-like pocket.
- The pouch and lace pocket were pretty long, so I sewed up the center to create some side-by-side pocket action.
- I clipped the zippered pouch to the sides of the vinyl because you can't pin vinyl.
- I stitched the pouch and trimmed it even even with the vinyl.
- I finished all the edges with a black double folded bias tape.
- Normally I would just stitch up the sides and call it done, but that wasn't going to work with this clutch. The sweet side-by-side pocket action would have been too cramped to utilize properly. I needed to add some depth to the clutch for the pockets to be fully appreciated. And so entered the wide velvet ribbon.
- I stitched in a length of ribbon on each side of the clutch to open up the interior.
- Then, I was d.o.n.e!!!!!!
The resulting clutch is a mixture of sexy, edgy, and pretty. I love it!
I hope you'll visit the challenge homepage and spend some time getting to know the participants. We have a big group of very crafty and creative people who I'm sure are going to blow us all away with their cool clutches. Thanks for all your comments! Double thanks for becoming a follower!
Happy crafting and big hugs from Montana,
Linking up here:
http://www.creationsbykara.com/2012/01/look-what-i-made-link-party-1-25-2011.html
http://somedaycrafts.blogspot.com/2012/01/whatever-goes-wednesday-101.html
http://733blog.blogspot.com/2012/01/sugar-spice-95.html
http://mygirlishwhims.blogspot.com/2012/01/your-whims-wednesday-43-and-features.html
http://www.gingersnapcrafts.com/2012/01/wow-me-wednesday-35.html
http://www.thestuffofsuccess.com/2012/01/success-u-wednesday-linkup-party-22.html
http://carolynshomework.blogspot.com/2012/01/inspiration-board-link-party-34.html
http://funkypolkadotgiraffe.blogspot.com/2012/01/too-cute-tuesday-linky-par-tay-67.html
http://www.vwbblog.com/2012/01/talent-tuesday-way-cool-linky-party_23.html
http://momommamoney.blogspot.com/2012/01/momomma-monday-link-up.html
http://mommybydaycrafterbynight.blogspot.com/2012/01/ta-da-tuesday-link-party-22.html
http://www.thekurtzcorner.com/2012/01/tuesday-tutorials-link-party-no-21.html
http://linda-coastalcharm.blogspot.com/2012/01/nifty-thrifty-tuesday-no98.html
http://singingthreelittlebirds.blogspot.com/2012/01/inspire-me-monday-good-morning_23.html
Labels:
challenge,
clutch,
embellishing,
sewing,
tutorial
Thursday, January 12, 2012
My Naughty Notion Challenge clutch is underway!
It's time for me to stop planning and actually get started with my Naughty Notions project. The project is due at the end of the month, and here we are nearly halfway there! I had a mini panic attack when I realized that and immediately went to work.
Here's what I've done so far:
![]() |
| this button will take you to the challenge homepage. |
Happy crafting and big hugs from Montana,
Wednesday, November 16, 2011
Solids-Only Tote Challenge: My Entry
Update: You can see all 18 of the finished totes and voter for your favorite HERE. Anyone can vote once a day until Dec. 31st.
Hello tote fans!
Keren from sew la vie and I have been very busy lately hosting The Solids-Only Tote Challenge! You should visit the challenge homepage, read about the challenge guidelines, and meet all the challenge participants. Including the hostesses, we have 19 participants!!!!! [insert girlish squeal!] Yes, 19 talented people from all over the world!!!! It's very exciting, isn't it?
Since bags are kinda my gig, I was stoked for this challenge. I made a pretty impressive [insert tooting sound of my own horn!] inspiration gallery and pinterest board from which to draw ideas. My big ideas? Wanna know 'em? Well, scroll down if you don't. [insert cheeky wink!]
First big idea: Patchwork. I've been obsessed with quilting lately. Mostly due to Keren's influence, I should add. I made quilts for my son and daughter. So, with quilting on the brain, patchwork was a gimme.
Big idea number two: Don't buy any new stuff! I have plenty of everything and don't need to go out and buy anything new. In fact, this really should have been my first big idea!
Third big idea: A cool, as in tonal temperature, pallet. This kind of goes hand-in-hand with my aforementioned quilting compunction. Now stay with me and I'll tell ya why. Gray. Yes, the color! Gray is popping up all over the world of design. [That and citrine, which I didn't realize was a color.] In the home decor realm you see it in everywhere from nurseries to dining rooms. In the quilting realm, it's shoving cream out of the running for top neutral. Here are a couple of my gray faves from my quilting pinterest board:
And there you have it. Now you've seen the before, so let's move on to the during:
| And here is a nice view of the embellished front. |
| I found a scrap of vinyl to use for the bottom and some teal wooden handles. |
Phew! This is turning out to be a long-winded post. I'm going to just chill at this point and show you some pics of the finished tote. Just leave a comment if you have any questions.
![]() |
| The easiest way to show the inside is to turn it inside out. |
![]() |
| I used big ol' plastic buttons for feet. |
That was a lot of pictures! I hope it didn't take too long for it to load up. Thanks for sticking with me! November is the month to count your blessings and reflect on all the things you are thankful for. I am so thankful for all my readers out there. Thanks for taking the time to browse through my posts, for leaving lovely comments, and for telling others about me! You rock!
Happy crafting and big hugs from Montana,
Subscribe to:
Posts (Atom)