

Thursday, November 8, 2012

Baby Tuff Update

Guess who's coming home after 109 days in the hospital? TUFF!!!! We have nicknamed my cousin's sweet son Tuff because he is just that: Tough as all get out!
Socks for Sandy

I ran across this wonderful way to directly aid the victims of Hurricane Sandy.
If you'd like to help out by donating socks and clothing,
CLICK HERE FOR MORE INFO.
Lots of love and hugs and prayers for my east coast neighbors,

Friday, November 2, 2012
Fab Folds Challenge Winners Announced!

Remember waaaaaay back in September when we were working on pleats, pintucks, and smocking? I know, it seems like forever ago to me as well! Anyway, the waiting is over. After a whole month of voting, the poll results are in. Please visit THIS POST to review the challenge guidelines and THIS POST to see all the challenge entries.
The projects receiving the most votes are:
 |
Marisa from Passion et Courture created this striking smocked pillow.
She started used canadian smocking which is kind of cool since she's from Montreal!
The fabric had a subtle stripe or plaid that created really cool ombre effect when smocked.
Please check out her blog where she shows you how she made tons of great projects.
Marisa blogged about her pillow HERE.
|
Congrats Marisa!
Here's your shiny badge:

Your bragging rights are fully activated!
 |
Bella from Nisabell Necessary made this incredible smocked book cover.
She pulled out all the stops when it came to adding details.
The intricate smocking is decorated with tiny beaded flowers--what dedication!
Please visit her blog and check out her fabulous tutorials.
|
Congrats Bella!
Here's your shiny new badge:

Your bragging rights are fully activated!
 |
| Mira from Sewing the Littleheart Collection made a tunic with leggings. She managed to successfully include pintucks, pleats, and smocking all in one outfit! All those techniques were perfectly executed (in knits no less!) and smartly placed--great job! Please check out Mira's blog packed with lots of handy tutorials. Mira shows you how to recreate this outfit HERE. |
Congrats Mira!
Here's your shiny new badge:

Your bragging rights are fully activated!

These challenges are so rewarding for me as a hostess and a participant. I love getting to know all of you and being inspired by your creativity. I am constantly amazed at how different all the final entries are. Congrats to all the participants! It's not easy being presented with both a challenge and a deadline, but you all finished with style and class. Thanks for all the effort you made to support each other and this challenge. I hope we'll have this connection for a long, long time. I look forward to hopefully working with you again in the future! BIG HUGS!!!!
Happy crafting and big hugs from Montana,
Wednesday, October 31, 2012
DIY Dog Coat

WARNING:
This post contains way too many photos of my dog!
They are not even very good photos!
I'm sorry! I couldn't help myself!

After Pippa, our cockapoo, got her last haircut she transformed from a shaggy black sheepdog to a skinny legged lapdog. Then temps dropped, and snow fell. I worried about Pippa getting cold during our walks so I decided to sew her a little coat. I found this free pattern that was for a very small dog:

After I printed out the PDF and did some measurements, I decided I could alter the pattern to fit Pippa. You can see I used my blue tape to tape together the pattern and the pink marker where I made the alterations:

After tracing onto some freezer paper I came up with this:
 |
| Super Loxol Freezer Paper, With Long Term Protection of 12-15 Months, (Google Affiliate Ad) |
Then I used the pattern on an old sheet and saw that I needed to make some adjustments. I moved the belly strap up closer to the neck and chopped a few inches off the back. My edited pattern looked like this:

Once I finished making the pattern, I gathered my supplies:
- Outer fabric
- Lining fabric
- Batting: Mountain Mist Batting 51055 Polyester Quilt Batting-Queen Size 90 in. x 108 in. FOB -MI (Google Affiliate Ad)
- Fleece
- Sew-on Velcro: Velcro Brand Industrial Strength Hook / Loop Tape - Tape (Google Affiliate Ad)
- Polyester Thread or Invisible thread: Dritz 82425 Invisible Thread 150 Yards -Clear (Google Affiliate Ad)
I cut out an outer and lining fabrics, adding a 1/2 inch seam allowance:

I sewed together some scraps of quilt batting to make an insulating inner layer without the seam allowance:

I decided the quilt batting wasn't going to be warm enough, and sewing together my scraps was tedious. So I cut out an old fleece blanket (sorry Grandma!) and added that for extra warmth. You can see from the above and below pics that I did a quick zig-zag stitch around the edges of the filling to secure them together:

I safety-pinned the batting/fleece to the outer layer of fabric, laying it evenly within the seam allowances. Then I marked a grid to guide my machine quilting:

I quilted the batting to the outer layer:

I added the looped side of the Velcro to the outer tabs and the hook sides to the lining tabs. I just used some Velcro strips I had in my stash. I recommend using the sew-in, rather than the adhesive Velcro. This part wasn't too hard, but I had to sew the hooked Velcro from the the back because it keep grabbing my top thread. Here's what my Velcro looked like:

I lined up and pinned the outer and lining fabrics, right sides together, and stitched around the perimeter using a 1/2 inch seam allowance. I left a 3 inch opening to pull it all through later. I notched the curves and corners and then turned it all right side out. I top-stitched the edges and I was done:

I think that Pippa likes her coat. Well, she knows that we're going for a walk when I put it on her. Perhaps she's just tolerating it because of the walk. In any case, Pippa doesn't seem to mind wearing the coat. She was apprehensive about the sound of the Velcro pulling apart, but cockapoos are notoriously skittish dogs.
And now for more pics of Pippa:

She's pretty, isn't she?

She LOVES the snow!

One last photo:

Many of the patterns and styles were quilted all the way through the coat and the raw edges were finished with bias tape. I like the finished look of those dog coats, but didn't want to spend the time fiddling with bias tape.
I'm sure I'll be making more coats for Pippa this winter. I think I'll alter the pattern again and move the belly strap up even closer to her front legs. If you look at the pic of the inspiration pattern, you'll see that one front tab (that goes around the neck) is longer than the other, while the tabs on Pippa's coat are equal in length. I might try that out for the next coat if I remember.
I'm also thinking about a doggie Halloween costume, a coat with a ruffled edge, a coat with some "bling" like silver studs, or a using a freezer paper stencil..... Lots of possibilities for such a quick and easy sewing project.
Have any of you, my lovely readers, ever sewn a coat for your dog? Does your dog have a flashy wardrobe? And I'm really curious about this: Do you think Pippa needs some matching booties?
Happy crafting and big hugs from Montana,

P.S. One more quick thing! If you're looking for a good, affordable dog bed that can be machine washed and dried, click on this photo:
This is what Pippa uses and we love it!!! I bought two rather pricey foam rubber beds with removable covers, but Pippa totally destroyed them both. She pulled off or chewed through the covers and shredded the foam rubber to tiny bits. No joke! This bed is less than half the price of the others I brought. It is all one piece and fits perfectly inside the crate. Pippa has slept on it for 2 months now without destroying it, so she must approve as well. The other beds didn't last 2 weeks.
Saturday, October 27, 2012
Scarves with patchwork and quilting

Here's a great roundup of creative and beautiful scarves.
I love the idea of wrapping one of these around my neck!
 |
| The "Versatile and Vervy Half-Moon Quilted Scarf" by Michele Made Me has so many beuatiful details of quilting, patchwork and embroidery. [source and tutorial] |
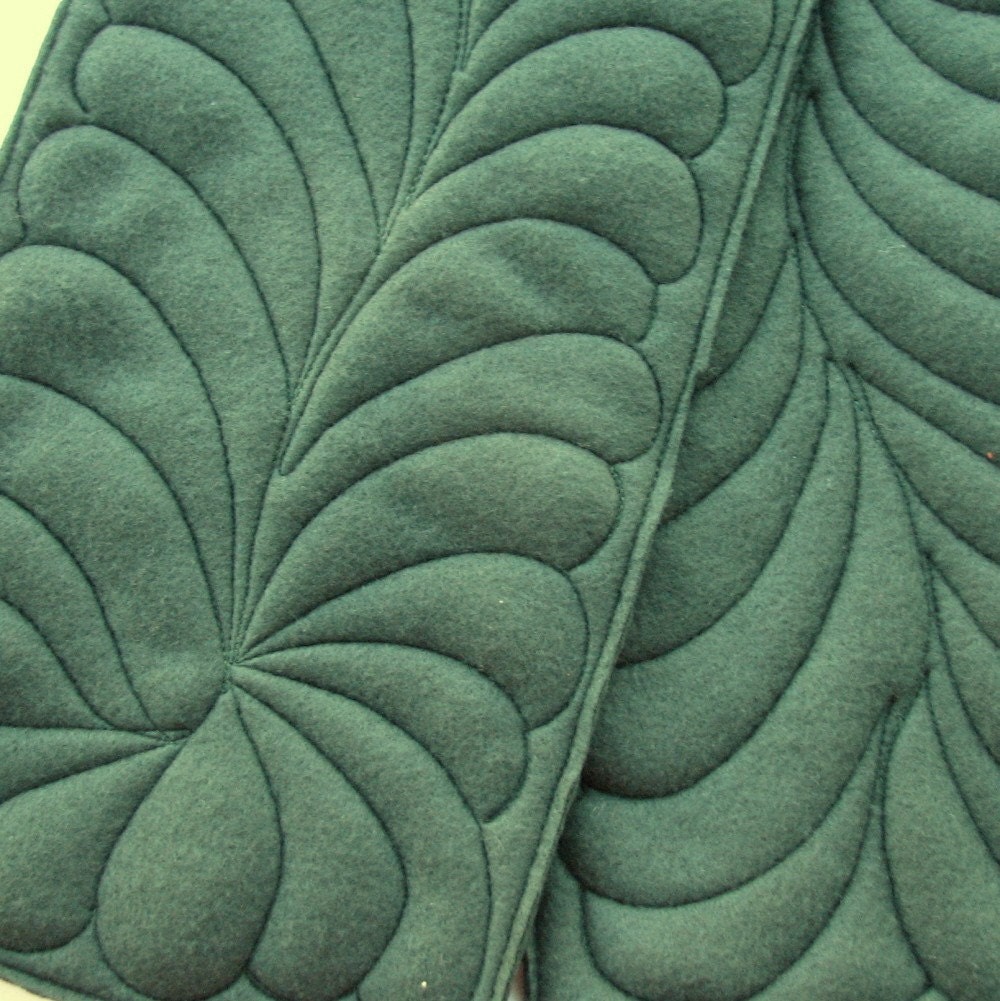 |
| The quilting on this fleece scarf by lmkquilts' etsy shop is just fabulous! What a classy detail to add to a plain fleece scarf! [source] |
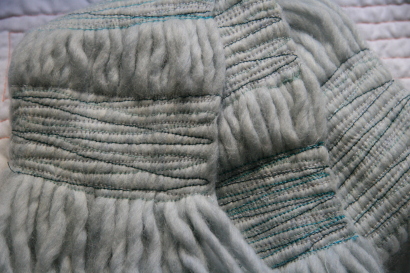 |
| Now here's a yarn scarf with no knitting or crocheting! The yarn was gathered and stitched through back and forth a bunch of times. I found thiscreative gem at katy did's blog. [source] |
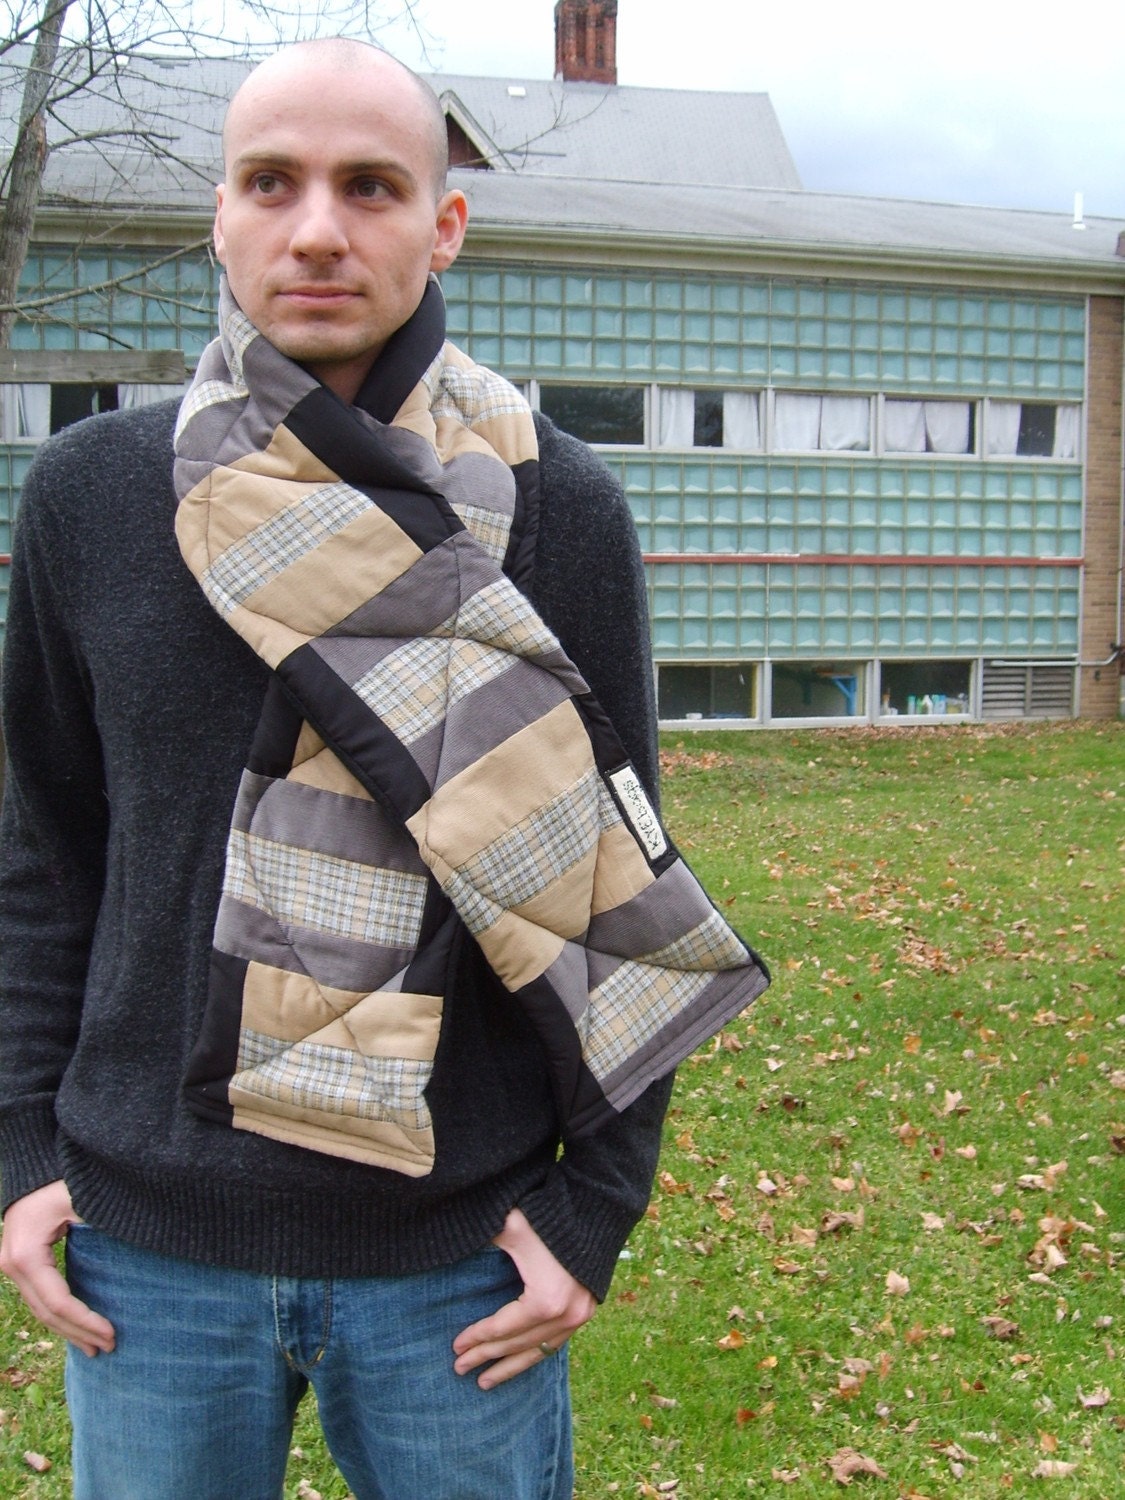 |
| Another scarf I found on etsy at kyebags' shop. I love the whole thing from the fabrics to the simple quilting. But sadly, my husband said he wouldn't wear it. :( I'll have to come up with a feminine version for myself! [source] |
 |
| Look! A rag quilt scarf! Brilliant! I found this at Jubilee Homespun along with a ton of more project ideas. [source and tutorial] |
 |
| Do you have leftover minky fabric from all those baby blankets you've been making? Well here's a good way to use them up! Megan from The Homes I Have Made crafted this scarf from a sew4home.com pattern. Love the pom-pom trim too! [source] |
 |
| Emily from Today's Mama posted this fab tutorial on how to create this fun scarf. I want one! [source and tutorial] |
 |
| Cathe form Just Something I Made gives a great tutorial on making these upcycled t-shirt scarves. I think I know some kids who might like one of these.... [source and tutorial] |
There are a ton more patchwork scarves that I could share, but you'll find most of them on the "Ring Your Neck" Pinterest board HERE. I love quilting, but I'm not so fond of all the time it takes to finish a big ol' quilt. These scarves are perfect ways to use up scraps and finish a project in an afternoon.
I hope you are inspired to make a scarf for the Ring Your Neck Scarf Making Challenge!
Visit the homepage HERE for more info.
OK, now which one is your favorite?
Happy crafting and big hugs from Montana,
Thursday, October 25, 2012
Scarves with Prints

One of the rules I made for November's Ring Your Neck Challenge is that sewing is optional.
Another rule is that you must try something new.
So if you aren't going to sew, let me suggest trying some fun dying and printing techniques:
 |
| This fine wool scarf was dip-dyed in indigo--a lovely effect. [source] |
 |
| I found these dip-dyed scarves on the Martha Stewart website. [source] |
| These striped shawls by Virginia Johnson are bright and fun. [source] |
 |
| Designer, Maria Alexandra Vettese has printed photographs of the the sky on silk scarves. Breathtaking! [source] |
 |
quoted from their website:
"about upstate:
kalen and astrid design garments utilizing their
own take on shibori* and dip dyeing.
each item is hand dyed and one of a kind."
[source]
|
 |
| A fun freezer paper print on a jersey scarf by Ashley Weeks Cart. [source and tutorial] |
 |
| These scarves from Bali would be fun to try. Whether you do a wax resist dye or handpainting or freezer paper stencil.... [source] |
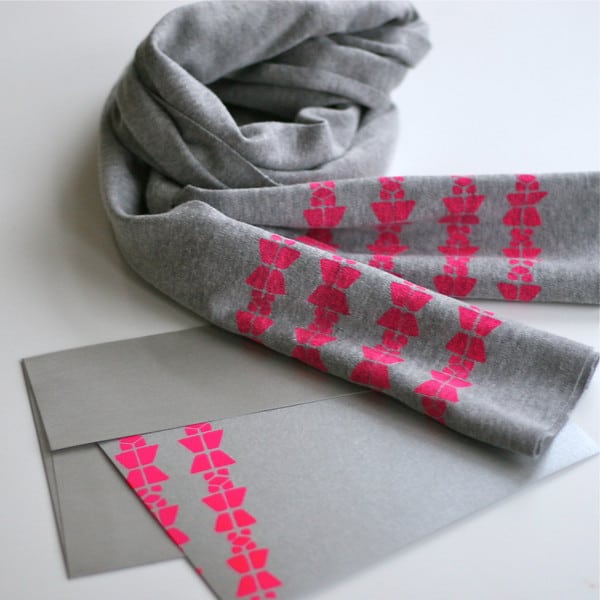 |
| A silk-screened scarf by the folks at Prudent Baby. [source] |
 |
| This cool "Quote Scarf" by The Fashion Planner was made with a sharpie. I want to try it too! [source and tutorial] |
 |
| Stacie at scarves.net gives a great tutorial on how make a "Galaxy Scarf" [source and tutorial] |
 |
| Here's another great freezer paper stencil printed scarf. This one is by Jessica Jones from How About Orange. [source and tutorial] |
So do you have a favorite you want to try?
Anyone is welcome to join the scarf challenge.
You can sign up HERE.
Happy crafting and big hugs from Montana,
Subscribe to:
Posts (Atom)
