I normally sew bags, but lately I've been stuck on quilts. So far I've made and posted about these quilts:
- Free-motion-quilted rag quilt
- Chevron rag quilt
- QAYG king-sized quilt (in progress)
- HST chevron quilt
Plus, I've also posted about these quilting projects:
I didn't use a pattern for this quilt. I picked out some coordinating fabrics from my stash, made some HSTs, fooled around with different configurations, and then sewed it all together. But my facebook friend, Miss Janice said she was hoping for a free pattern for this quilt, so I'm going to try it out.
As you can see from the photo below, the quilt is made up of half-square-triangles or HSTs. I've outlined the HST blocks with a black dotted line in the photo:

Here's how I make HST blocks:
 |
1)Cut 2 ten inch squares of fabric.
Stack them right sides together.
Stitch all the way around all the edges.
Use 1/4 inch seam allowances.
2)Cut diagonally from corner to corner.
3)Press the seams open.
4)Now you have 4 identical 6.5 inch half
square triangle blocks or HSTs.
|
Here's how I experimented with block configurations:
 |
| I used my Corel Paint Shop Pro Photo 2x program to make the center square in this diagram. Then I used the fill option to add color to individual blocks. As you can see I played around with lots of different patterns. I ended up choosing the pattern just left of the center square. I haven't tried it, but I image you can do this with any simple "paint" program that allows you to draw straight lines and has a "fill" option. |
I fabrics I chose were a pink with tiny white stars, a solid grey linen, a floral print, and a white sheet. I cut out the following 10 inch squares:
- 15 white
- 7 pink
- 4 floral
- 4 grey
I paired up the white squares with each of the colors and made HST blocks like I had previously mentioned. I ended up with:
- 28 pink/white 6.5 inch HST blocks
- 16 floral/white 6.5 inch HST blocks (I only used 13 for this quilt)
- 16 grey/white 6.5 inch HST blocks (I only used 15 for this quilt)
The tricky part was making this portion of the quilt:
 |
| You can see these 4 blocks are just a bit different than all the other ones. I took 4 of the grey/white blocks and added a bit of the floral print to each of the corners. This made a nice focal point on the quilt top. |
Here's how I modified the 4 grey/white blocks:
 |
|
Here's how I assembled the quilt:
- I laid out all the blocks in the correct order. My quilt is 7 blocks by 8 blocks. Then I sewed together one row at a time. After that I sewed all the rows together to complete the quilt top. The resulting top was roughly 40"x45".
- I cut a piece of thin cotton batting roughly 44"x49" so it was slightly bigger than the top.
- I went bought 4 feet of 45" pink flannel for the backing.
- I taped the flannel to my hardwood floor, centered the batting on top, and centered the quilt top over all that.
- I used curved safety pins and pinned through all the layers. I used one pin in each triangle.
- I machine quilted for a long stinking time....I like everything about making quilts, but the actual "quilting" part gets very tedious for me. (I show the machine quilting further down the page.)
- I squared up the quilt, trimming all the sides nice and even and straight.
- I made some binding out of a grey velvety polyester from my stash. The binding was 2" wide strips sewn together and pressed in half. One side was pressed under 1/2" from the edge and the other was 3/8" from the edge.
- I sewed on the binding, washed and dried the quilt, and then I was done!
Here's how I did the machine quilting:
 |
| First I stitched in the ditch on all the black lines in this photo. Then I took out all my safety pins. Then a made 2 lines of quilting onto all the white and 1 line on the non-white fabrics. So basically there are 4 lines of quilting follow all the black lines in this photo. The distance between the lines? I just had my needle centered the whole time and used the edge of my presser foot along the seam or stitching as a guide. |
 |
| This photo shows the next round of quilting. I stitched in the ditch for the most part, but you can see from the black lines in the photo that I did not overlap my previous lines of quilting. It's kind of hard to put into words so I hope the picture tells the story. |
Here's a couple pics of the quilting pattern. You can click on the photos to enlarge:


And so here's another look at the finished quilt:

I made this quilt to be auctioned off at a benefit for my cousin's baby who was born 3.5 months early. I posted about it HERE and would love for you to leave a comment on that post as I will be sharing it with my cousin and her family. The other quilt I made for the benefit is HERE.
So, I've never made a quilt tutorial before. What did I forget? If you need extra help with things like machine quilting and binding, I recommend Oh, Fransson's tutorials.
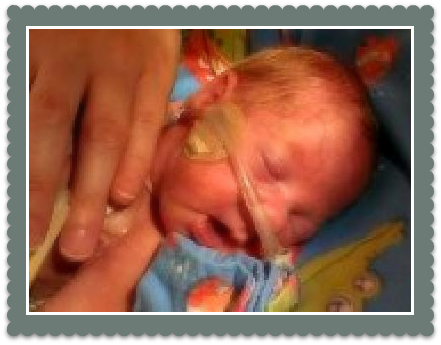
I'll leave you with a recent picture of the Tuffest boy I know:
 |
| On Sept. 4 he was a whopping 3lbs.10oz. and 16 inches long! He's come a long way from his 1lb.15oz. birthweight and 2 separate surgeries to repair holes in his intestines. That's why we call him Tuff! |
Happy crafting and big hugs from Montana,